It’s Friday! Before I move on to this new headband series, I want to congratulate Kristen S. who was randomly selected by random.org to win the $50 gift card to LOFT! Kristen also happens to be a twin mommy – so fun! Thank you to everybody who entered and made the giveaway an amazing success. I’m looking forward to hosting more in the future!
Today, we’re moving away from mommy fashion, and on to baby fashion! As many of you know, I had a boy first before having my twin girls, so I think I get extra excited to get them all cutsied up. I love picking out their girly clothes every day. I love painting their their toenails. And I’m really looking forward to the day when I get to braid and curl their hair! However, for now they remain my bald beauties and I think it will be quite some time until their blonde fuzzies turn into anything curlable.
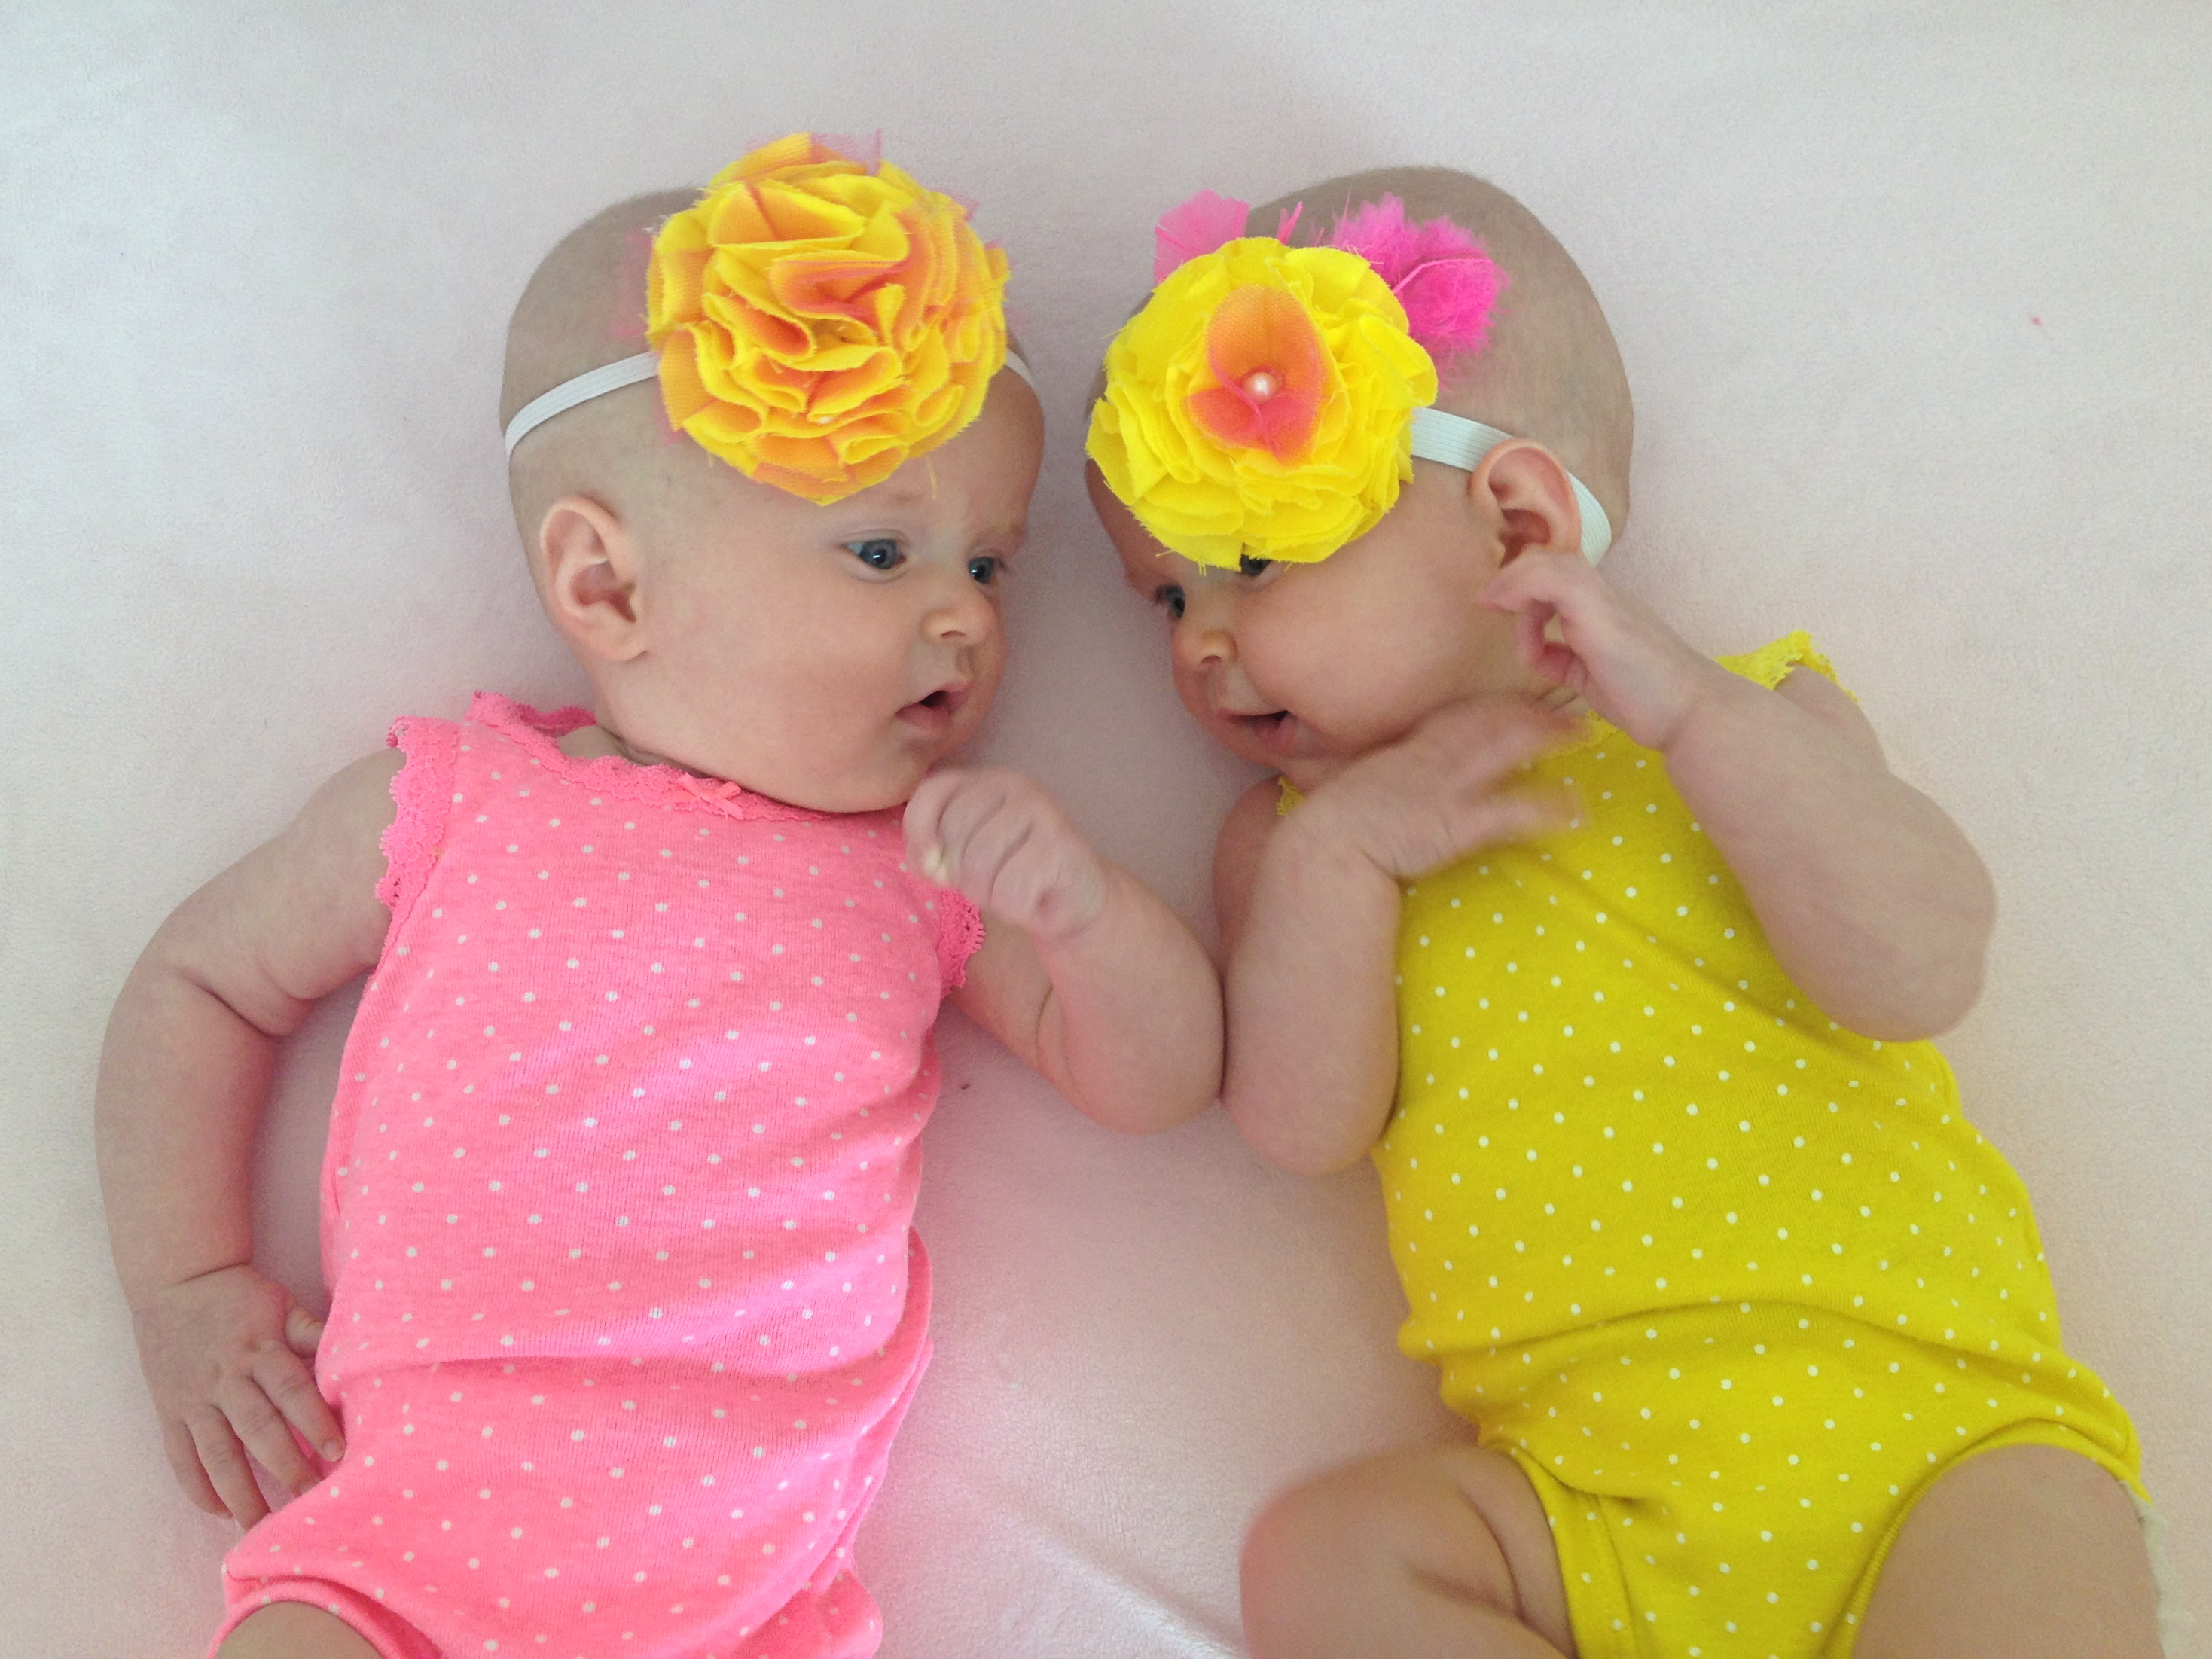 Being bald is okay, except for those handful of times when we’ve been out and about that people have mistaken my girls for boys. Apparently a pink car seat, pink blankets, and girly clothes aren’t enough! The few instances Baylen was mistaken for a girl I guess I didn’t really care, but you better not be callin’ my girls boys! SO, I remedied that. The new rule in our house is: “NO BOW…NO GO!”
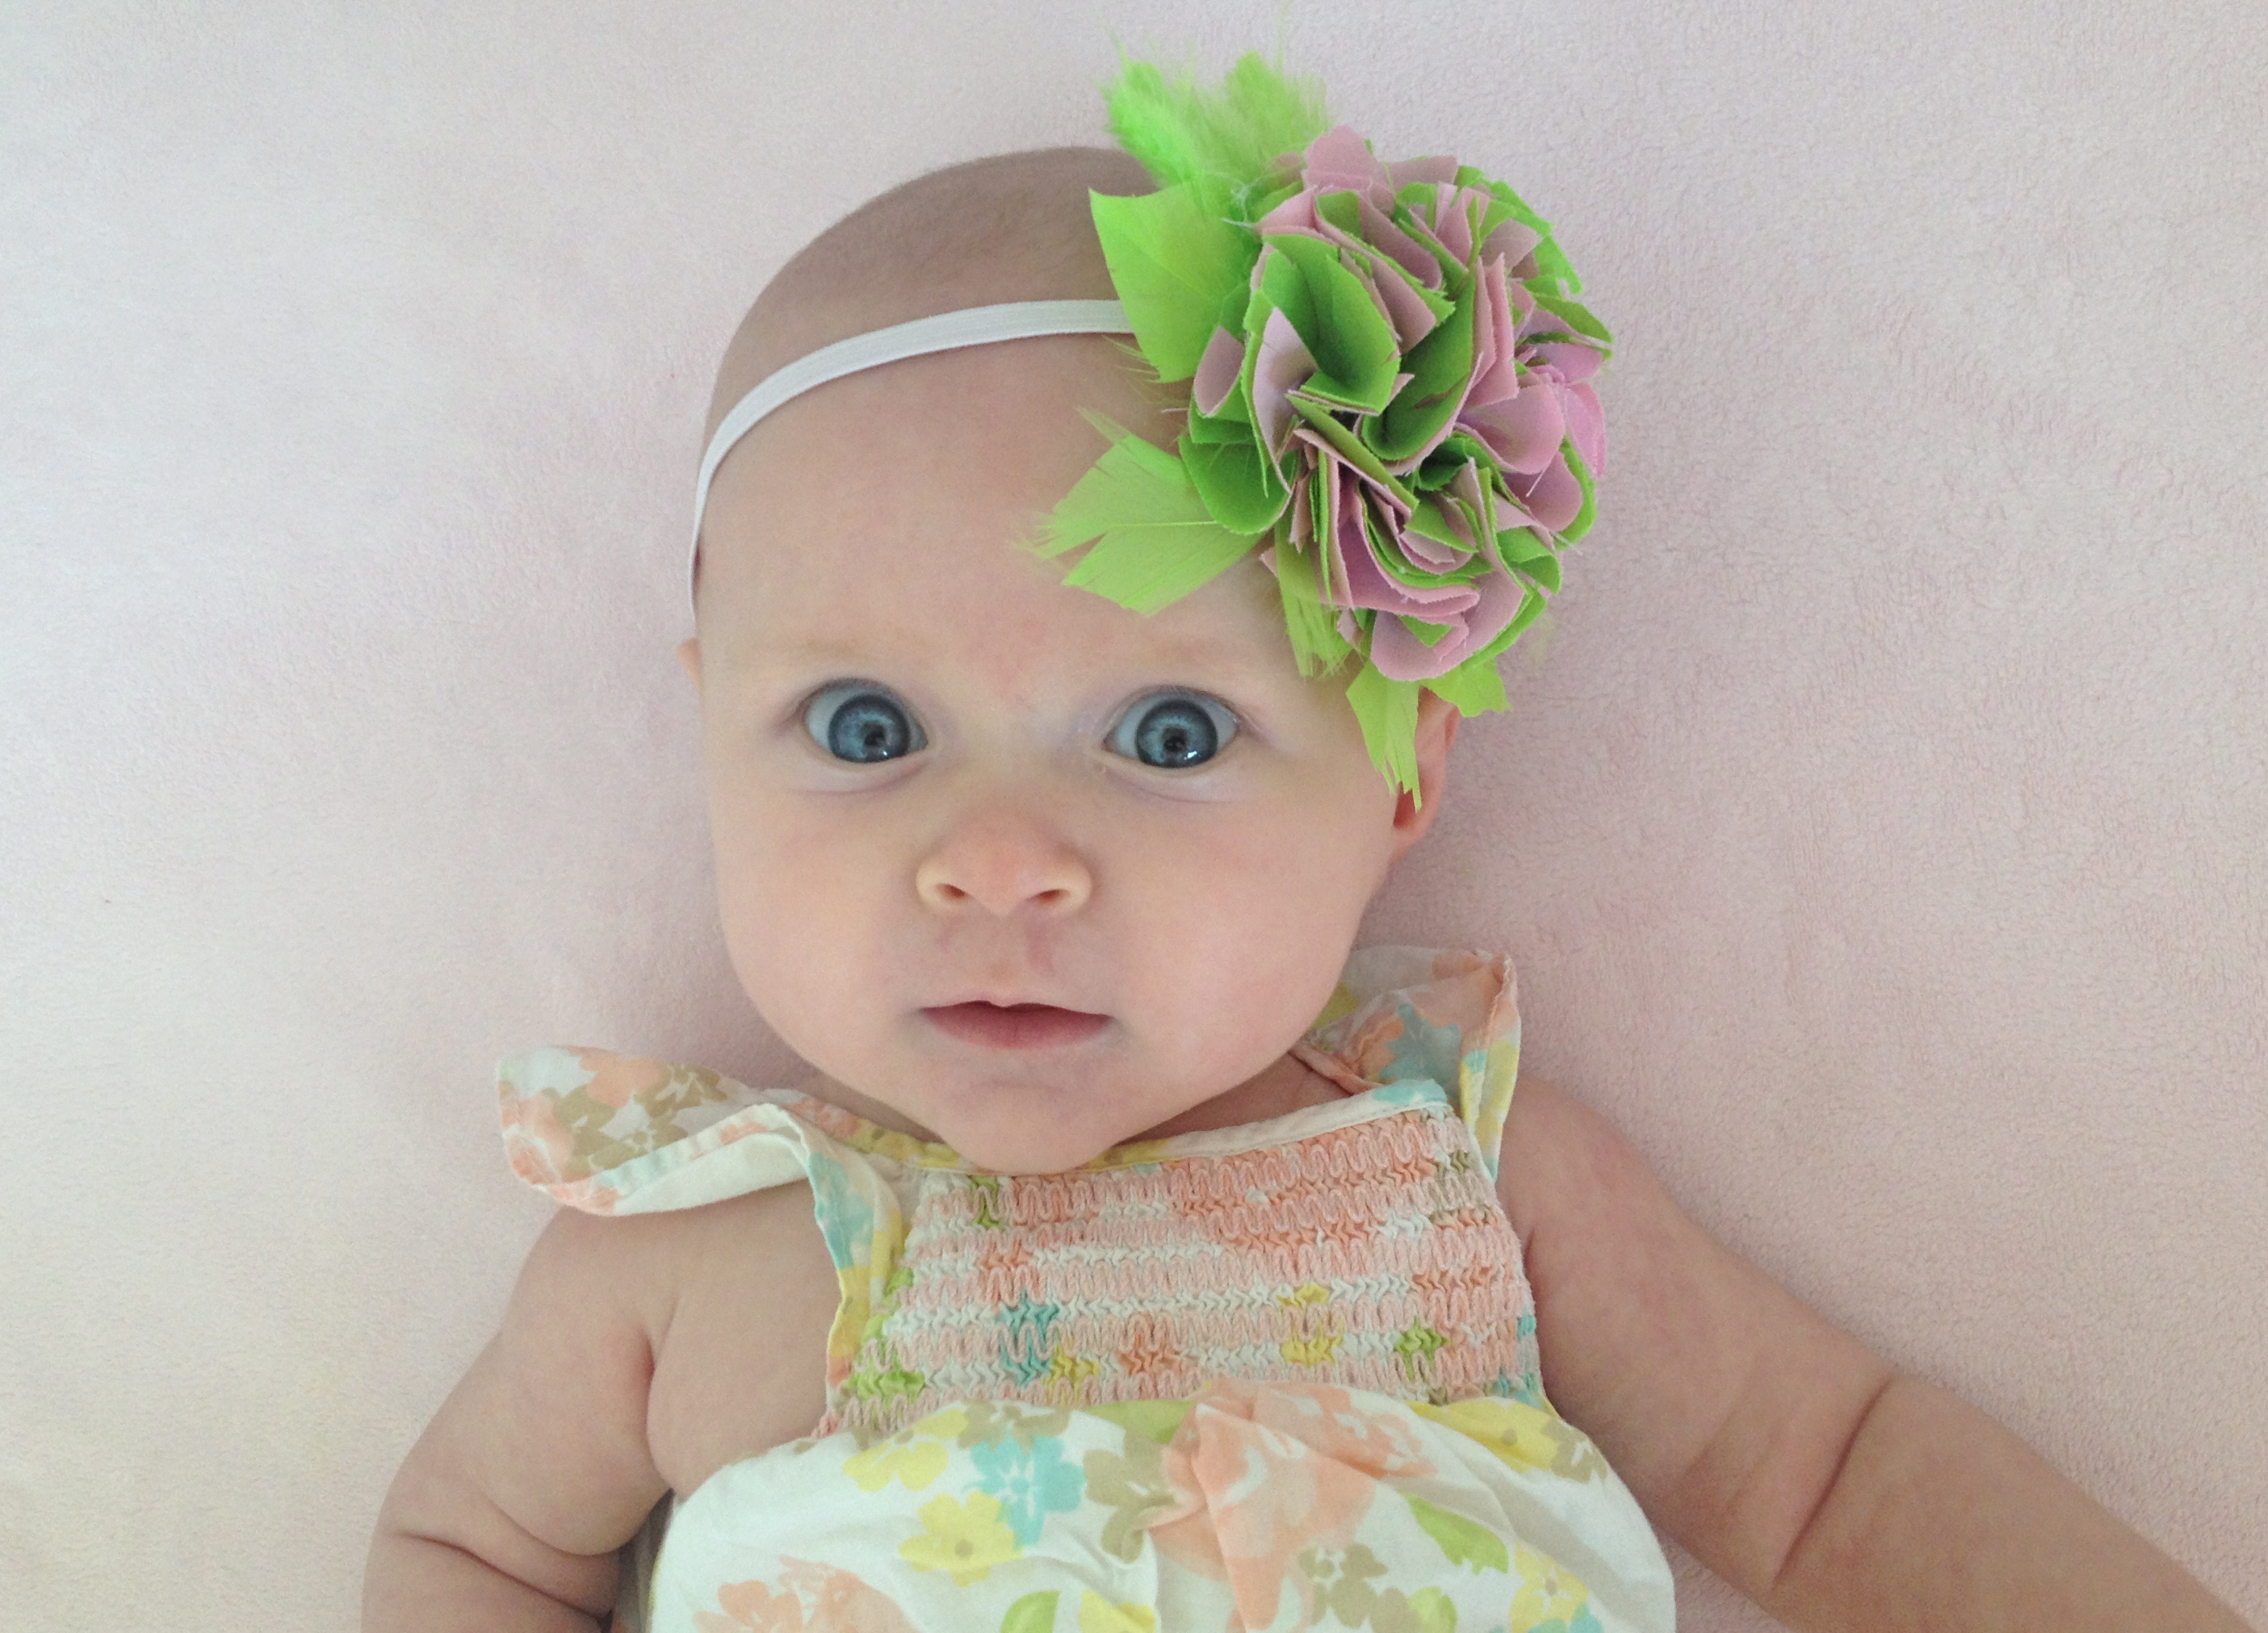 Ever since I found out we were having girls, I’ve been on the hunt for headbands. I found a few here and there, but have struggled to find cute ones that are as affordable as I’d like. So I set out to make my own. Over the next few weeks, I’m gonna share a few different methods I’ve discovered, and hopefully by the end of the series we’ll all have a decent collection. If you don’t have girls, I’m sure you know someone who does. These would make great baby gifts, or if you’re hosting a baby shower, it’d be a fun activity to do to with guests and awesome takeaways for the mom-to-be!
  Okay, let’s get started! All of the headbands pictured were made using the same method, just adapting it a bit to get a few different looks. (I also used this method to make wall flowers for the girls’ nursery!)
Supplies Needed
-Felt
-Cotton fabric in various colors. For a point of reference, 1/3 of a yard will make about 3 – 4 headbands.
-Tulle in various colors
-Scissors or fabric cutter
-Hot glue gun & glue
-Elastic (cheapest to buy it by the yard)
-Any extra bling you want to add to them
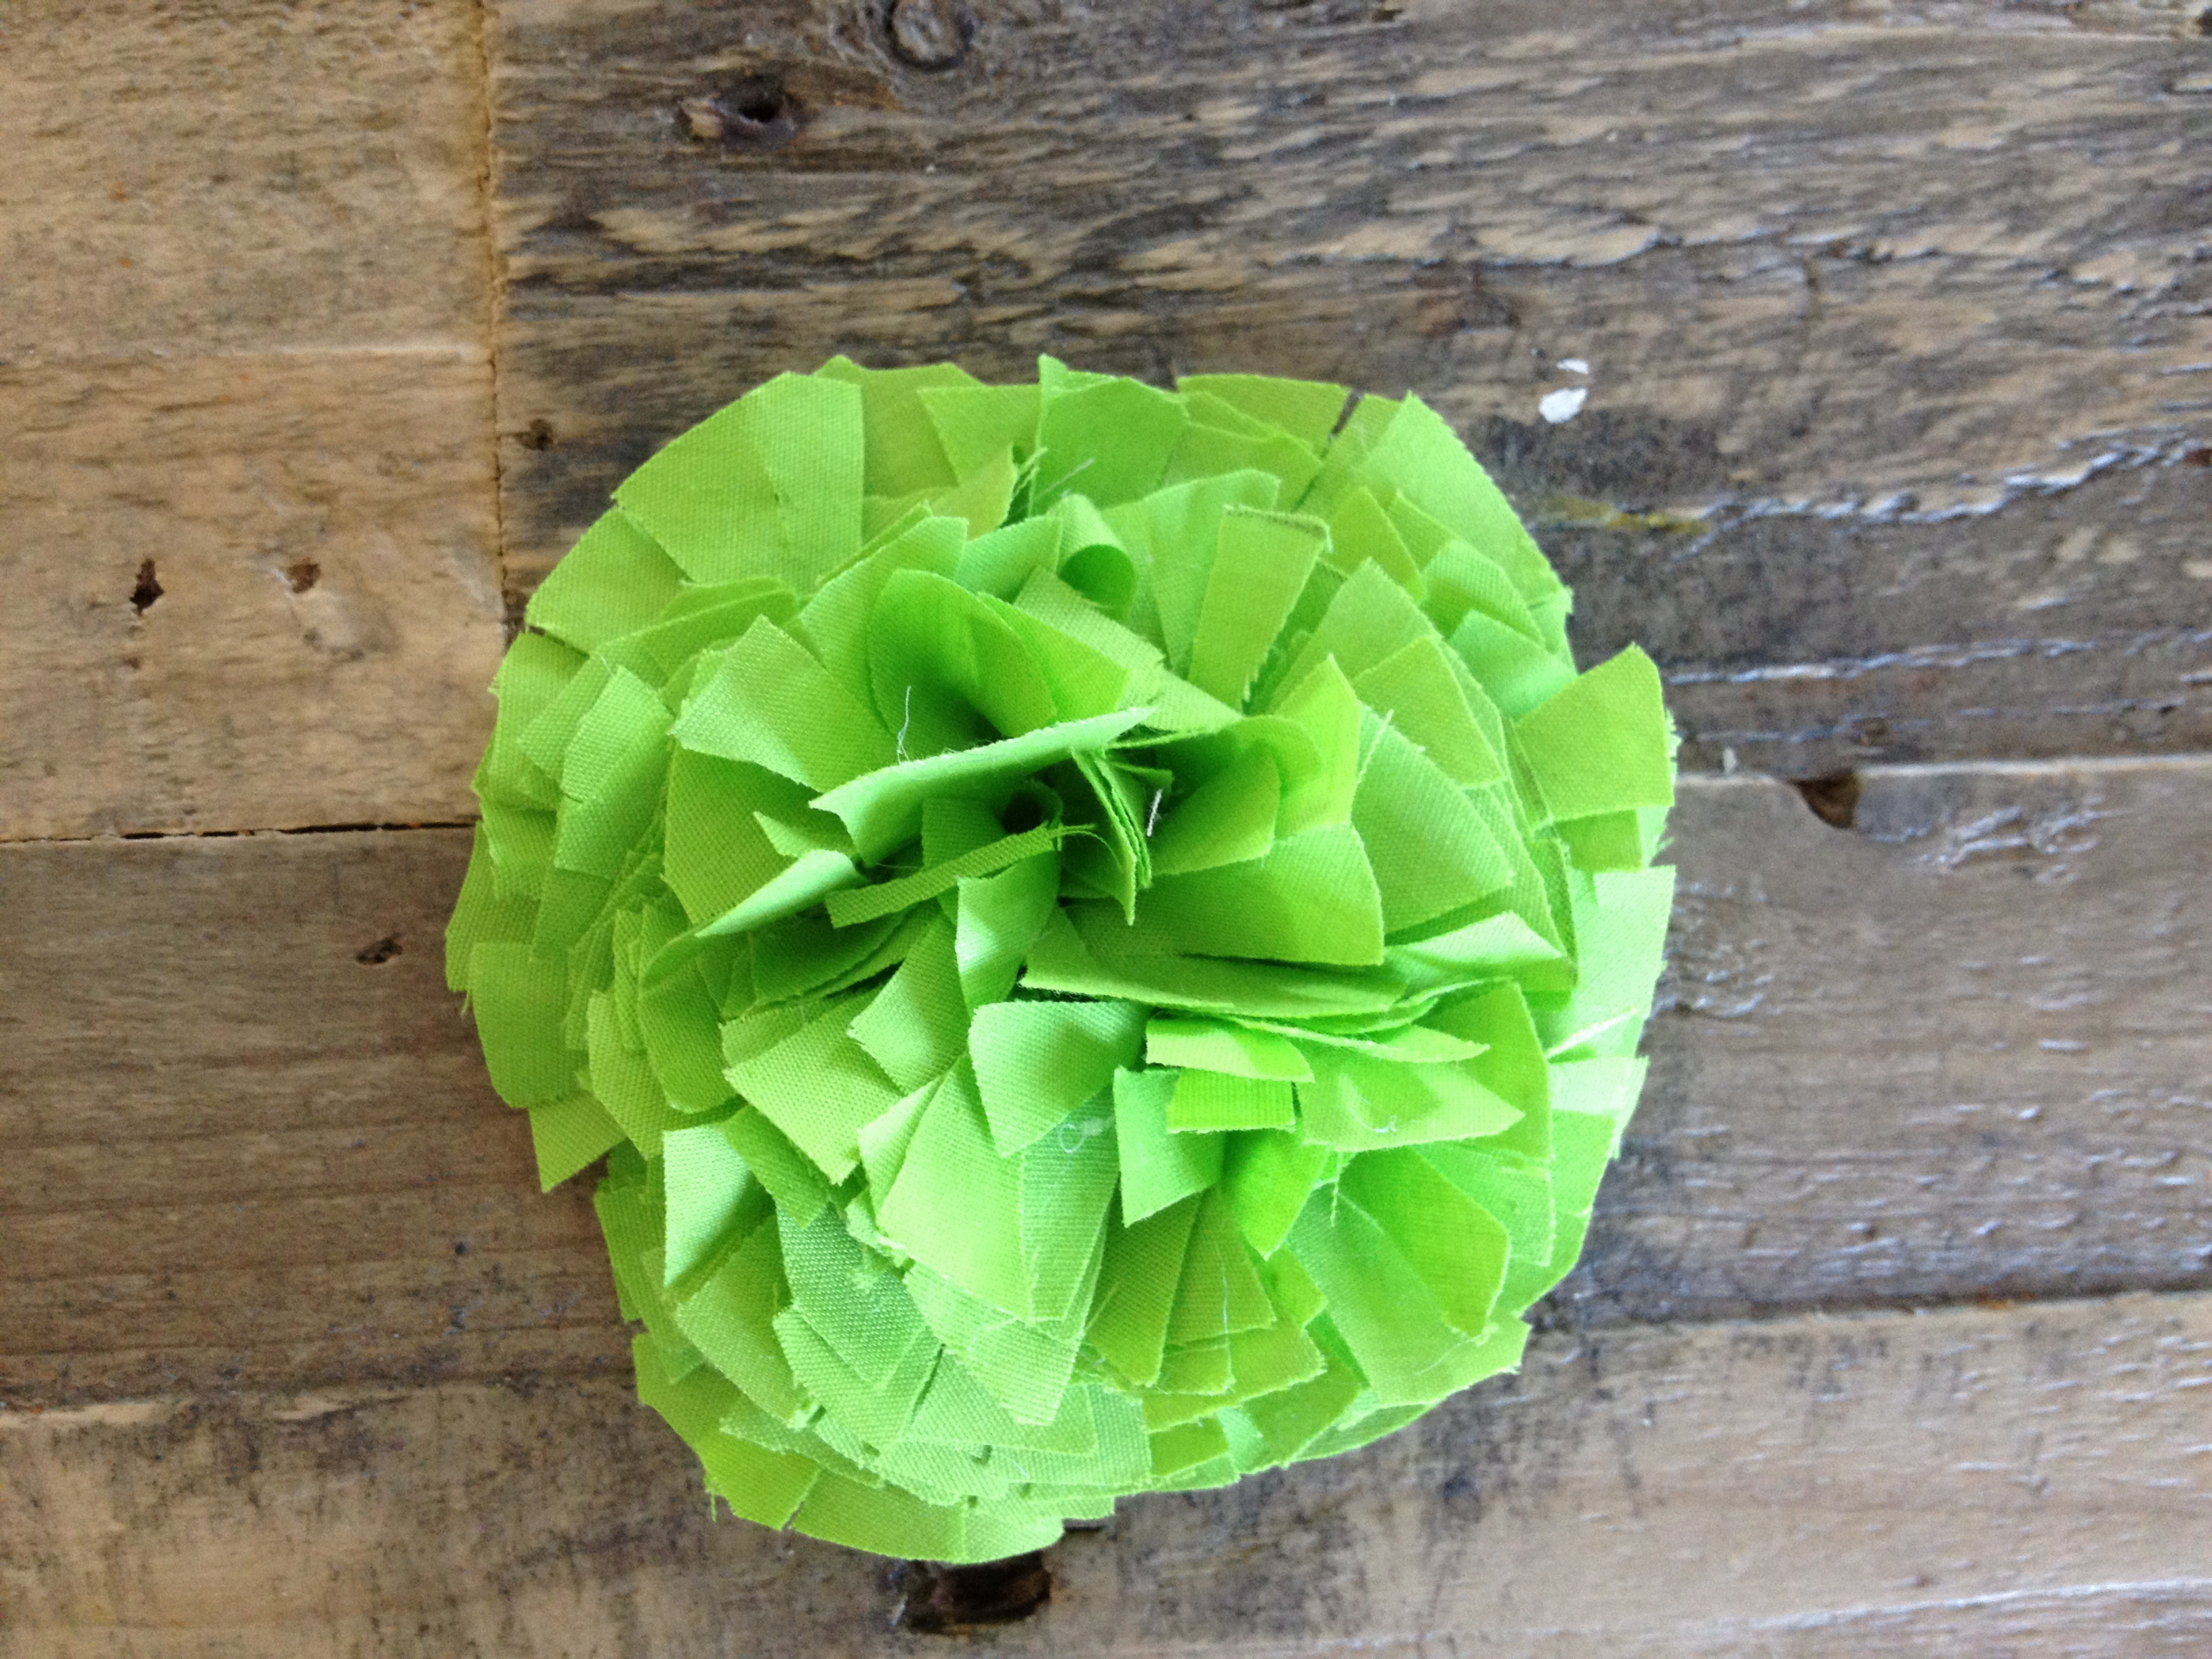
1. Cut out two felt circles, about 1.5 inches in diameter.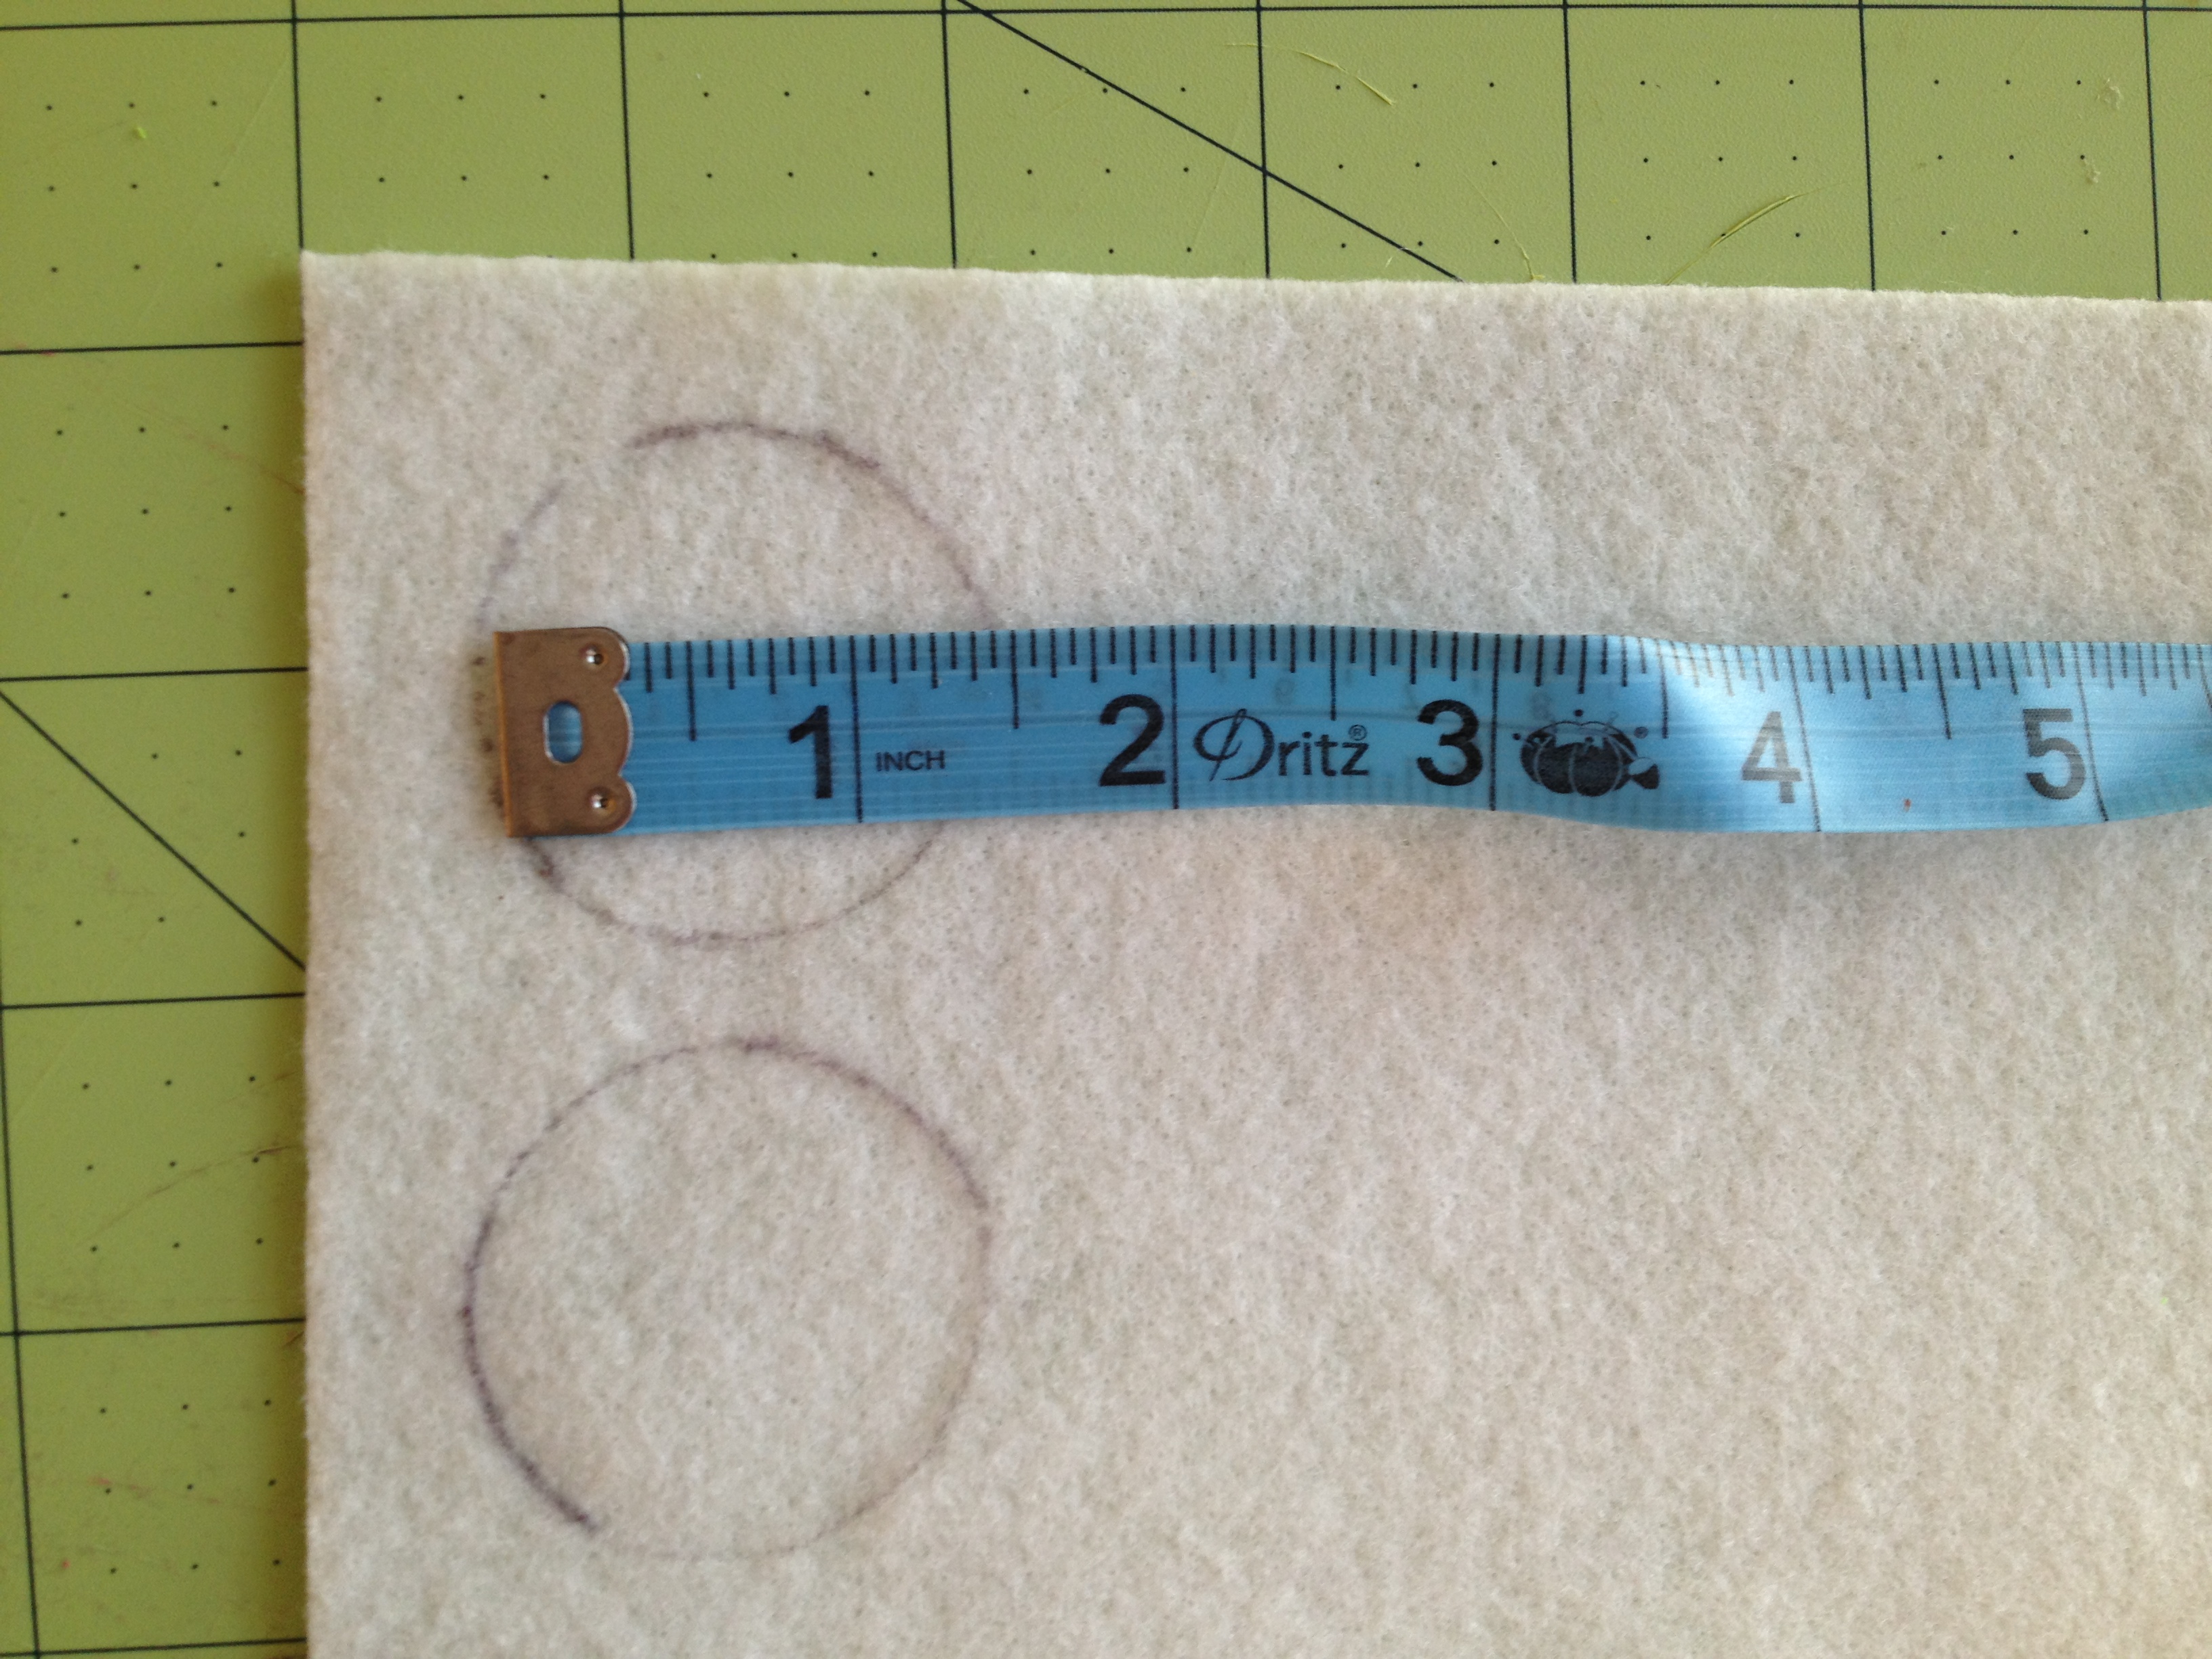 2. Cut out lots and lots of colored fabric circles, about 2 1/4 inches in diameter, although you can make them any size, depending on how big of a flower you want. The circles don’t have to be perfect. It won’t matter.
 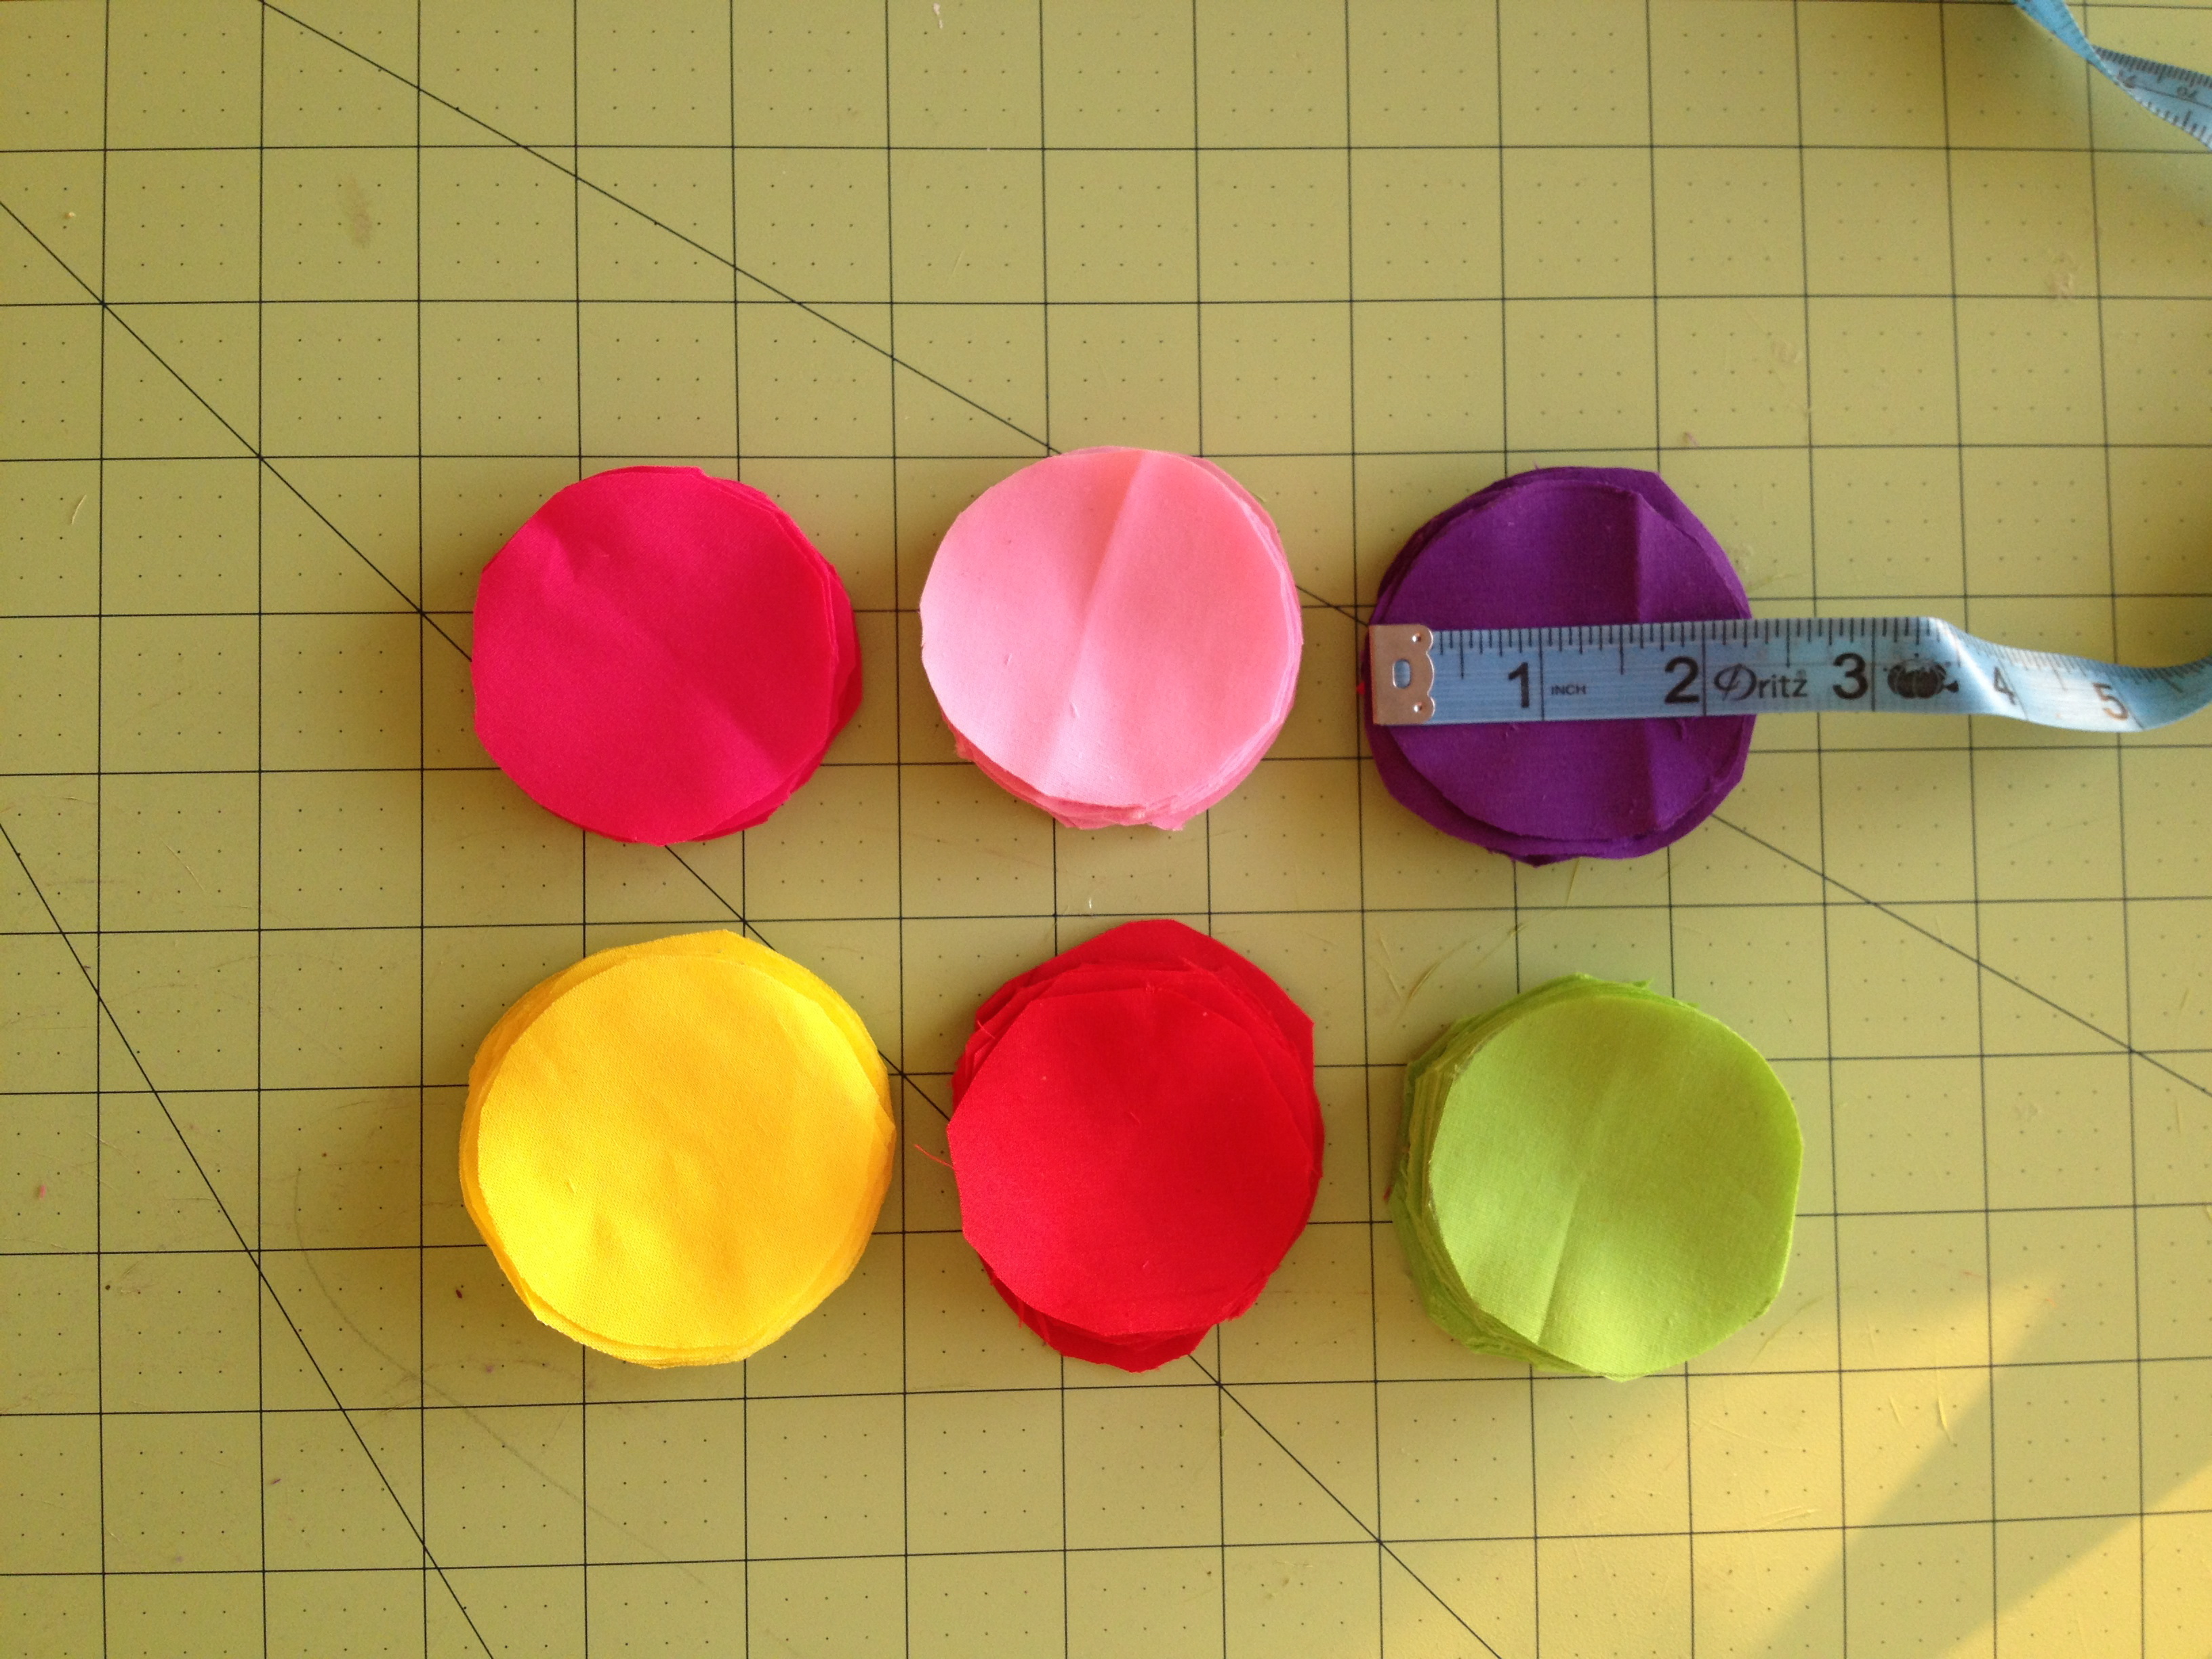 3. Take a circle (let’s not worry about layering the tulle for now…I’ll cover that later) and fold it in half both ways.
  4. Place a dot of hot glue in the center of the felt circle and glue the tip of the “petal” to the felt, pushing down firmly with your fingers. Be careful not to burn your finger with the hot glue.
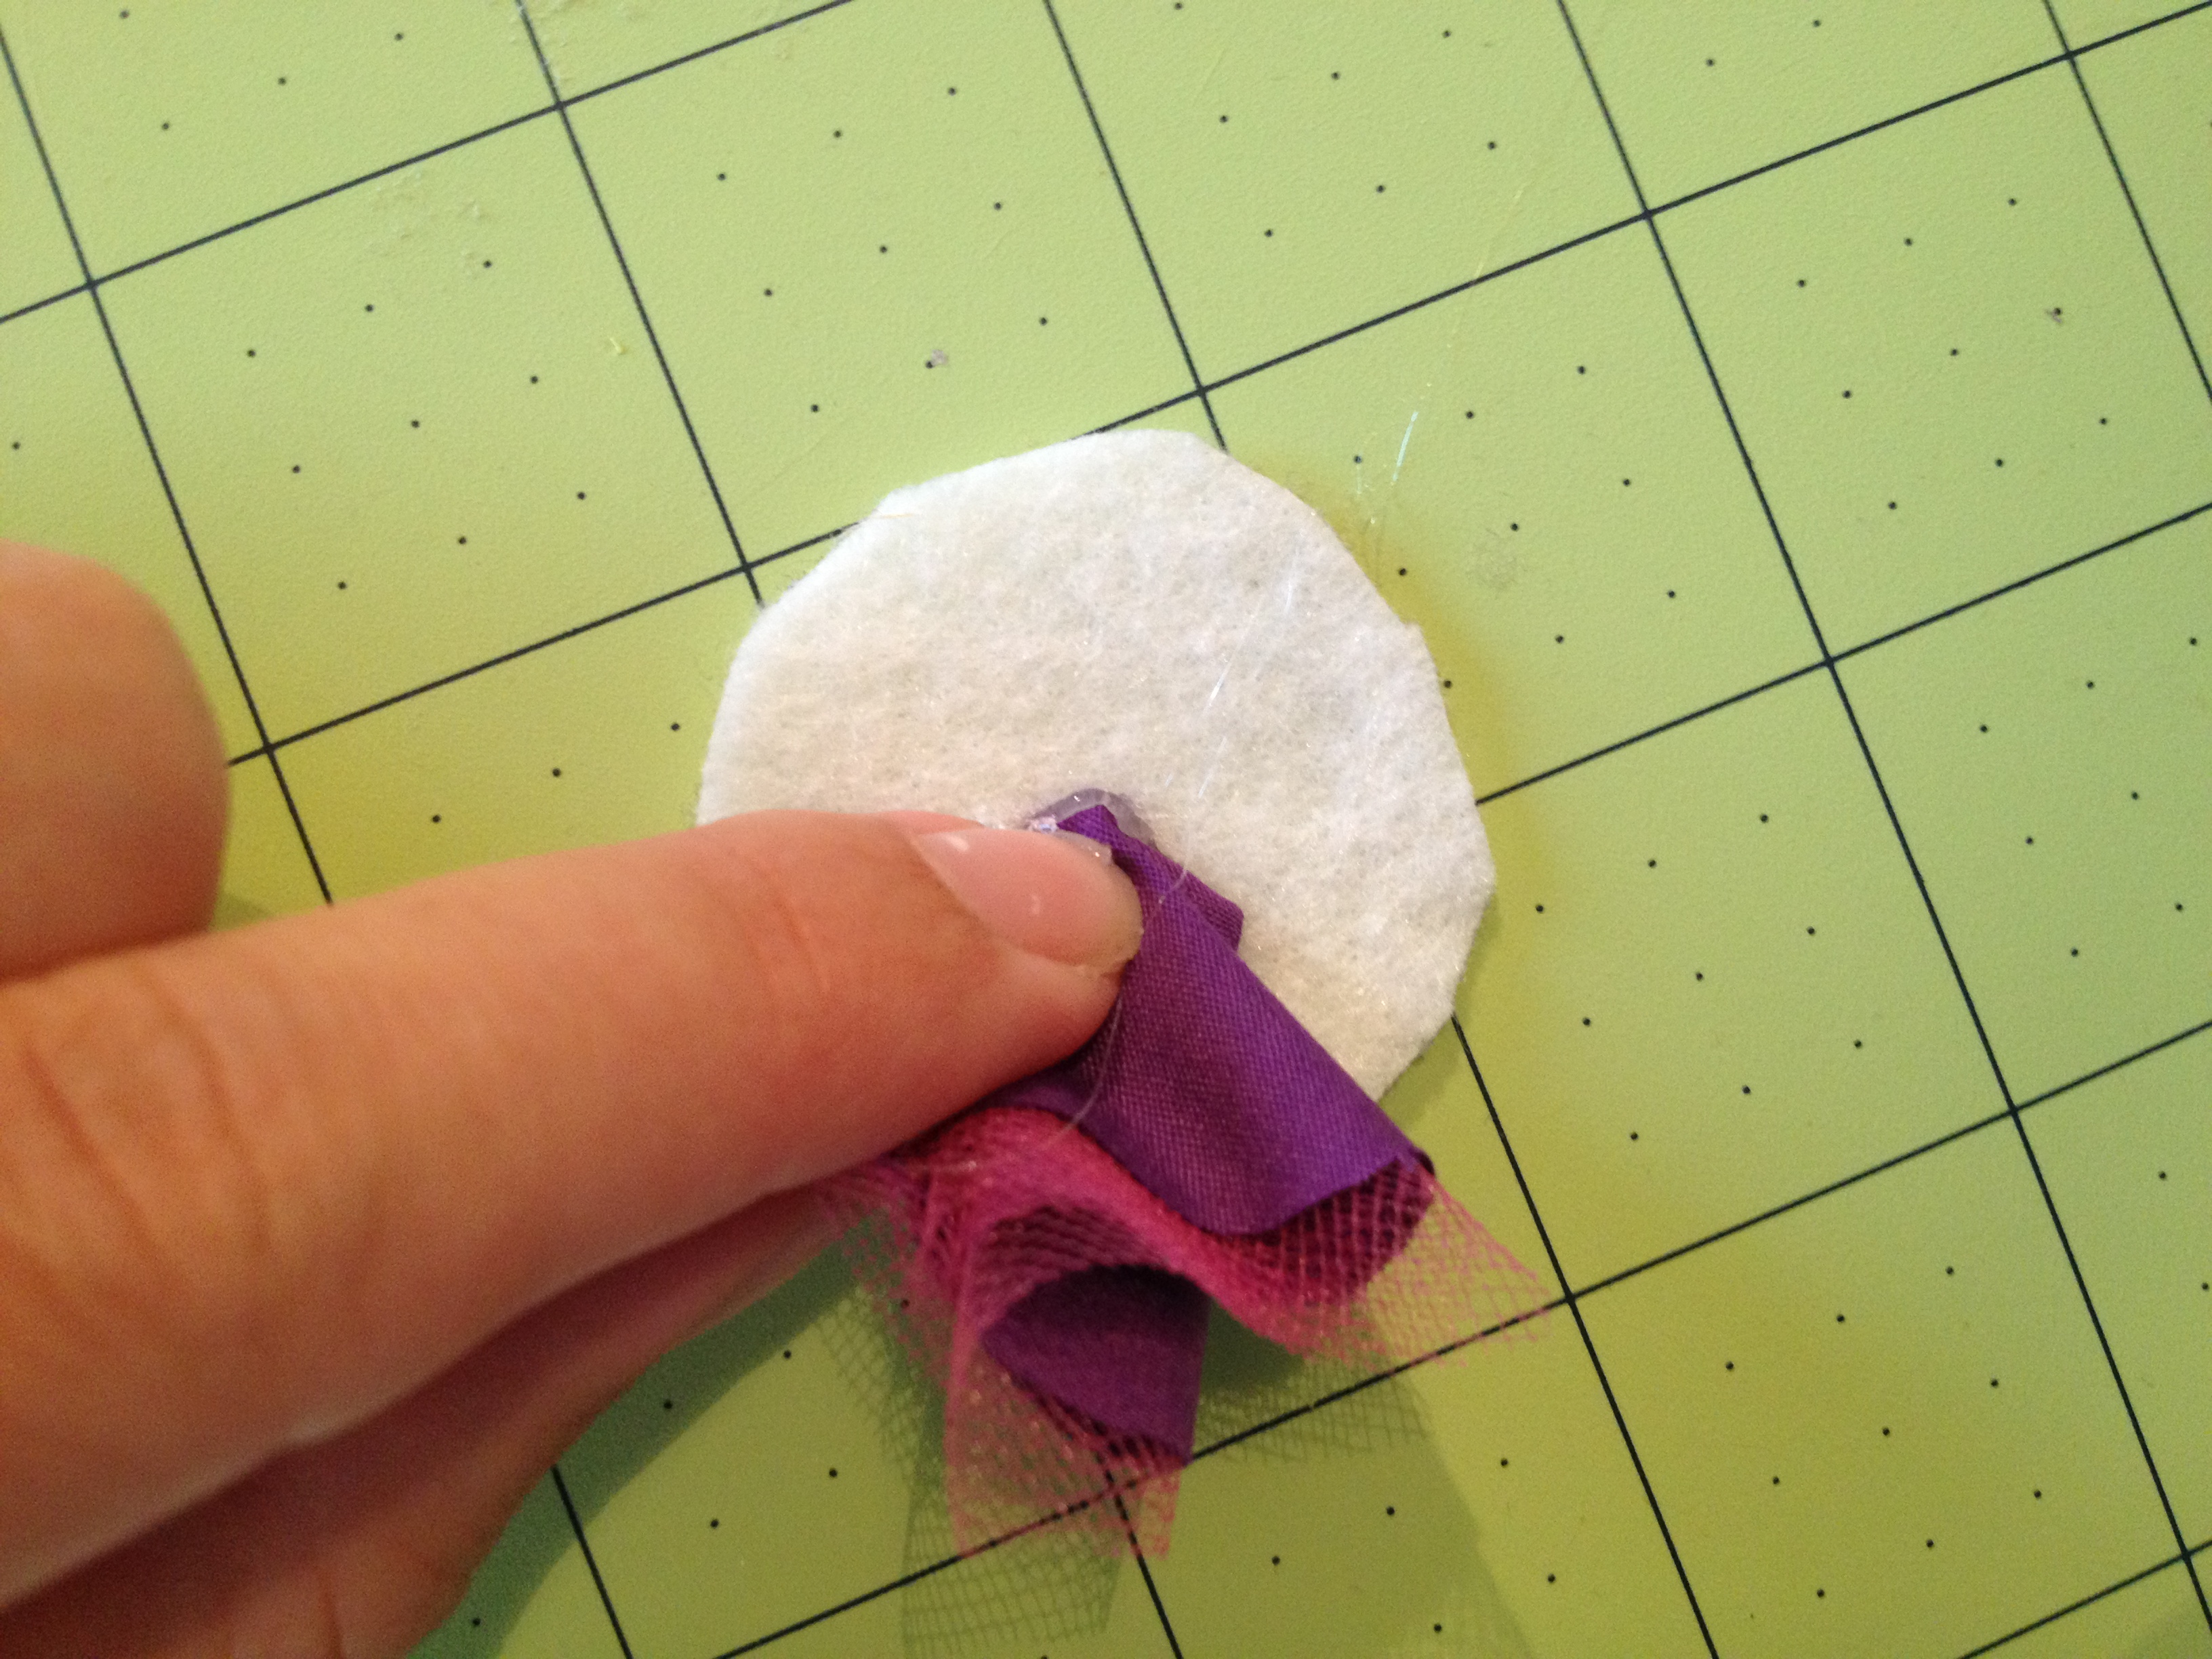 5. Continue gluing folded circles until the felt is full, or you have the desired flower shape you like.
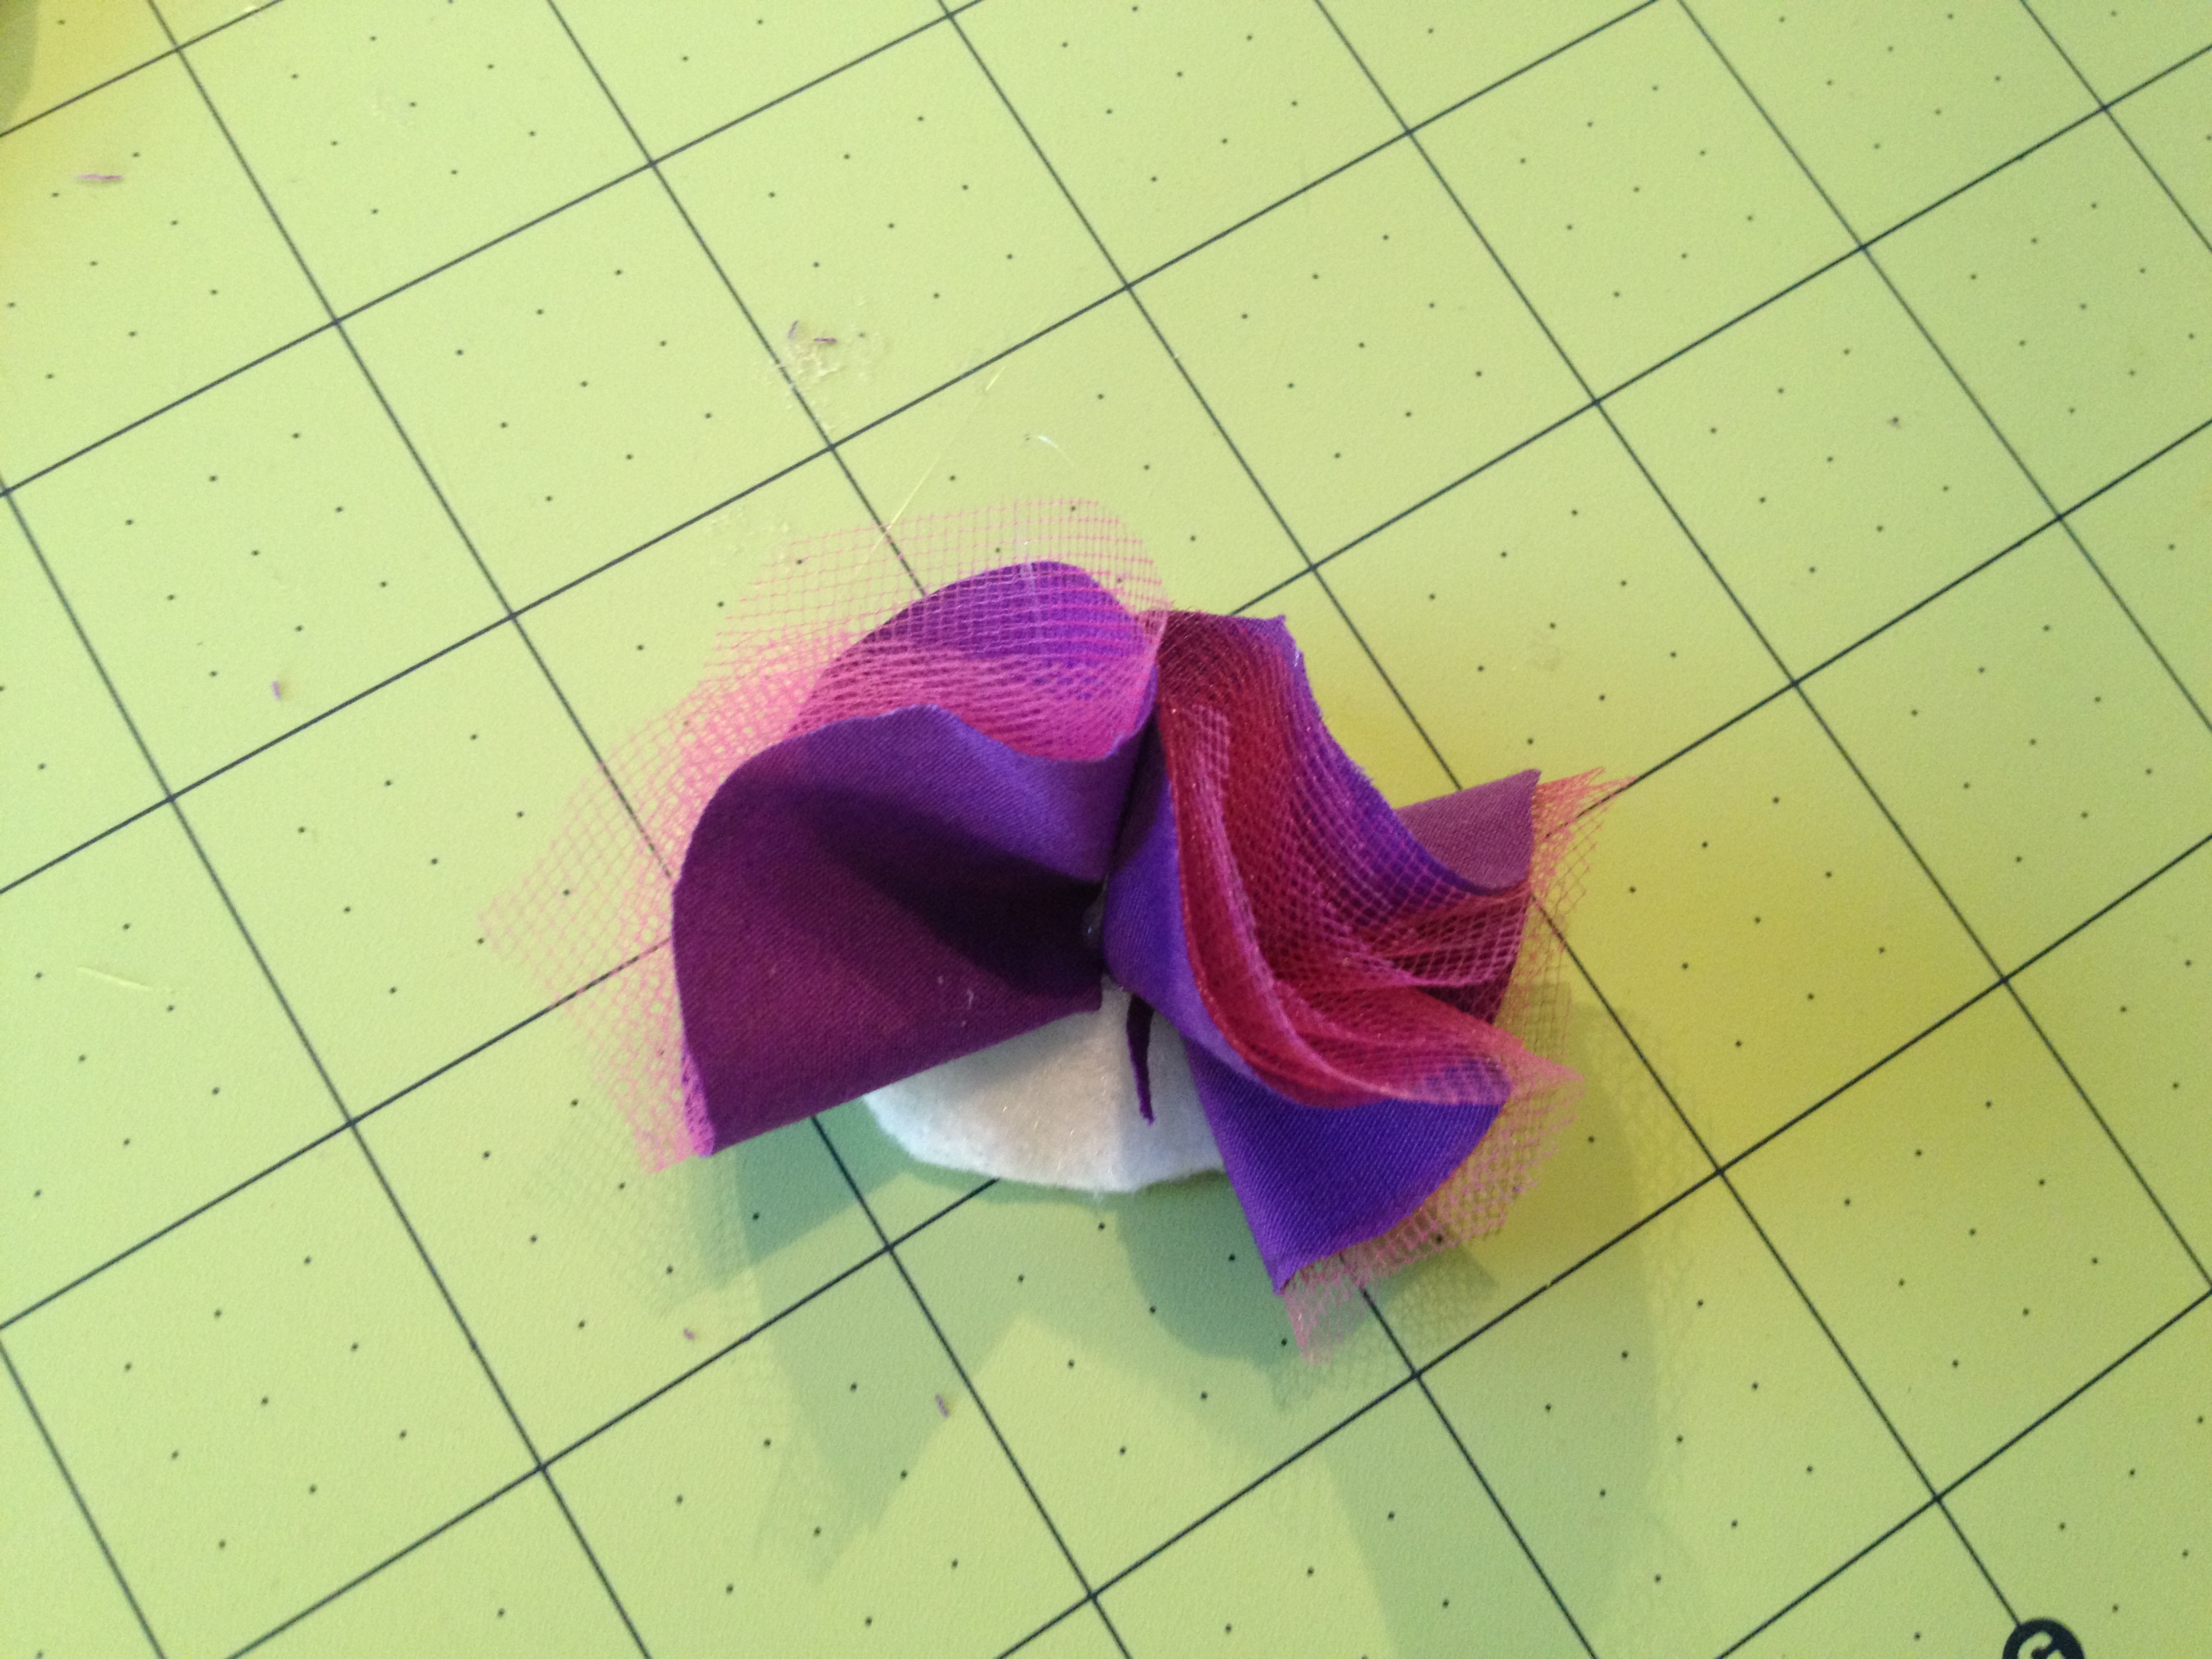
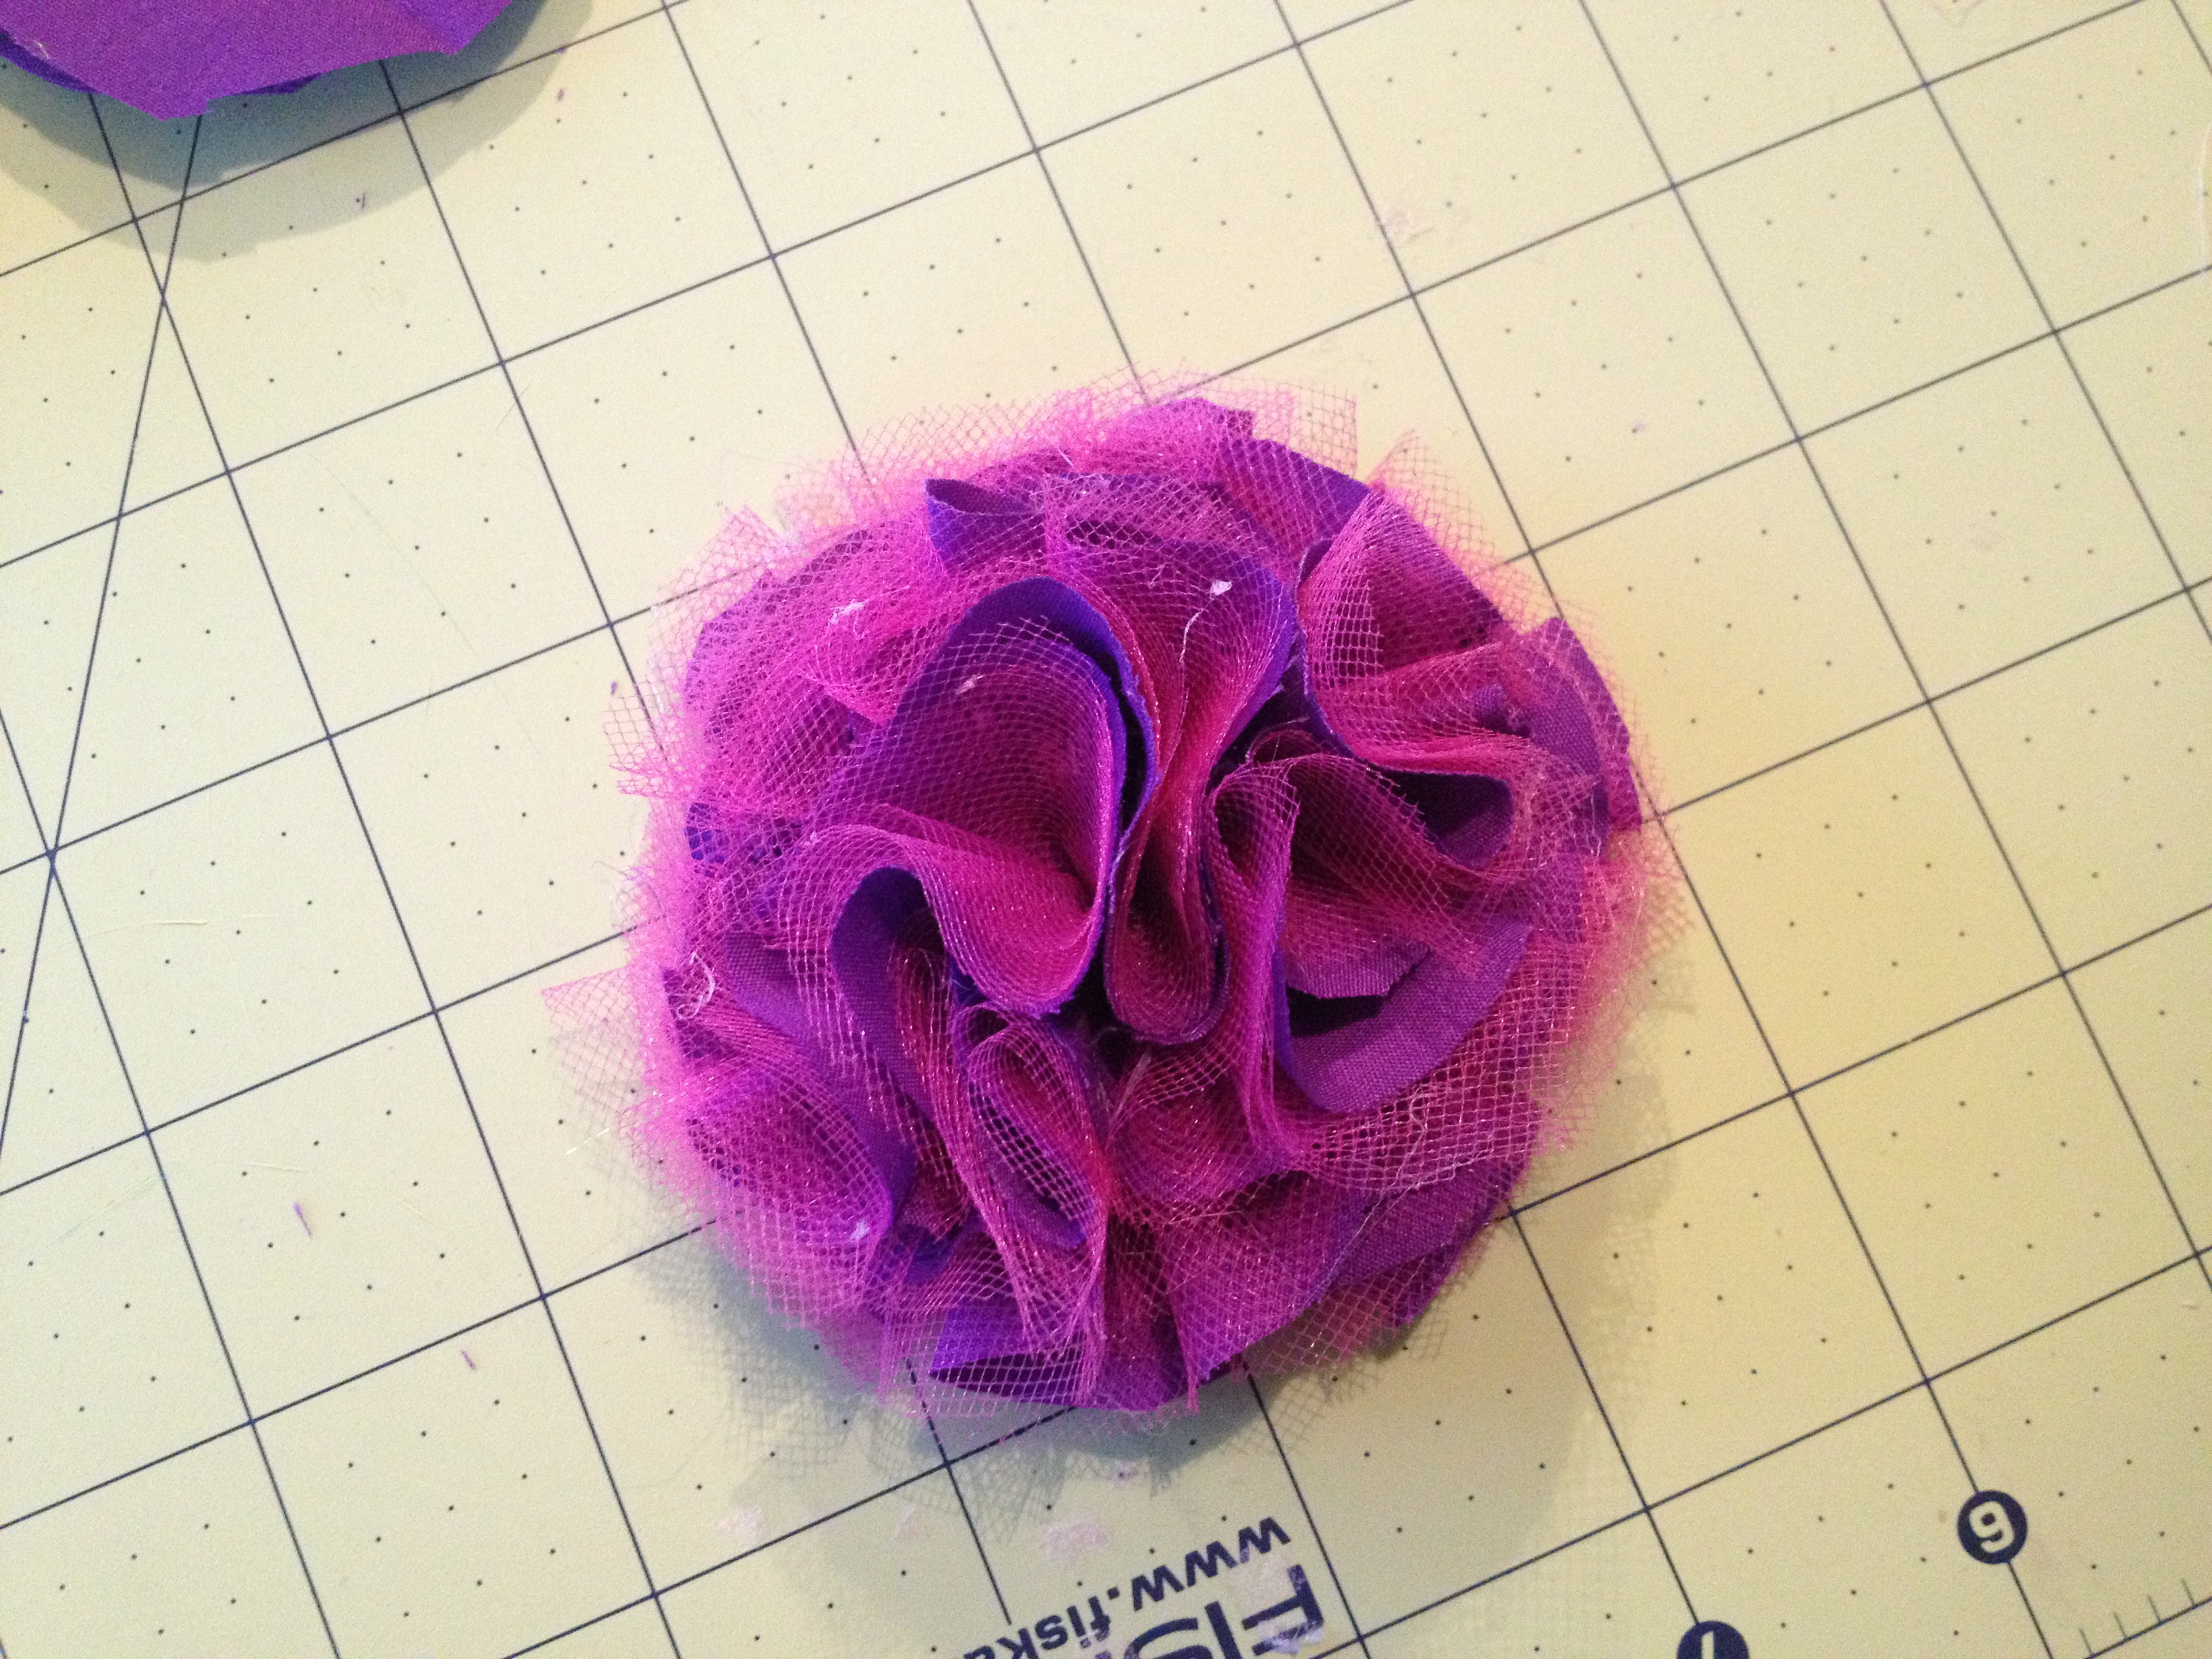 5. Leave it as is, or add a few jewels or feathers.
 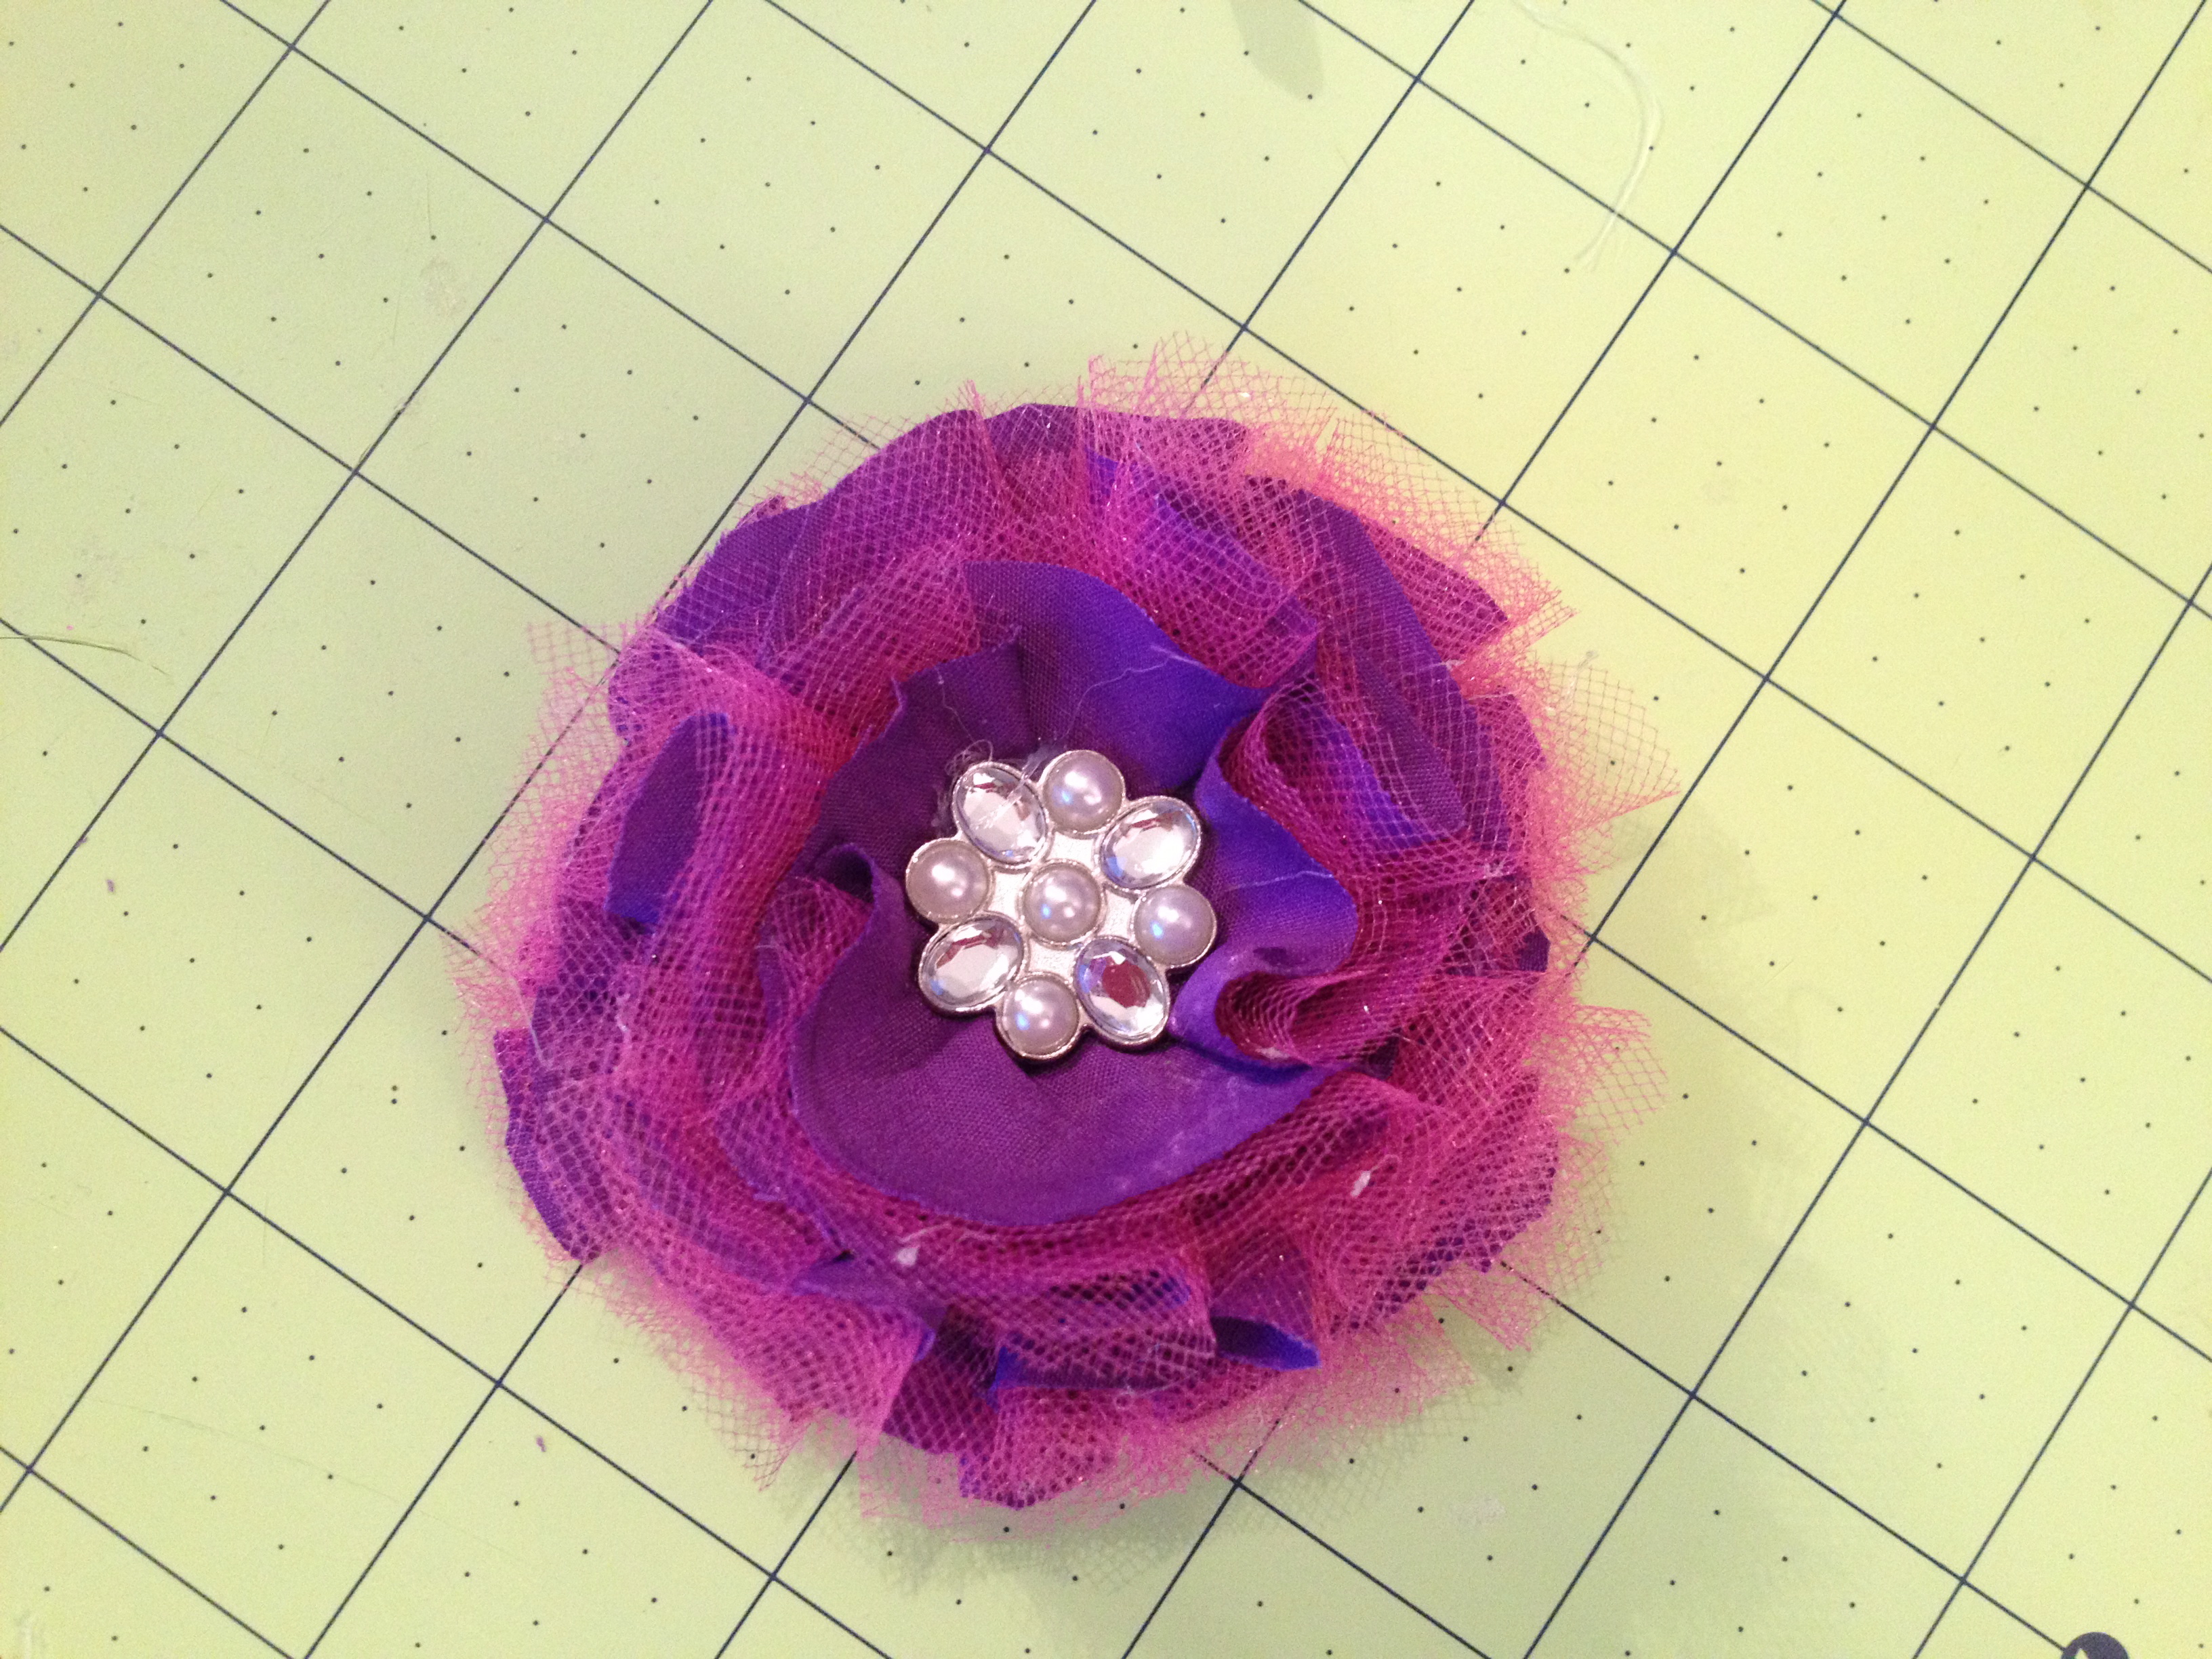 6. Cut your elastic to the desired length. Leave a bit extra on the end (approx.1/4″) so you can overlap the elastic when it is glued. Measure around your baby’s head, or use this size chart. The recommended lengths are as follows (including the extra at the end).
- Newborn – 13 3/4″
- 3-6 Months – 15″
- 6-12 Months – 16 1/4″
- 12m – Tween – 17 1/4″
- Adult – 18 1/4″
7. Glue the elastic ends together.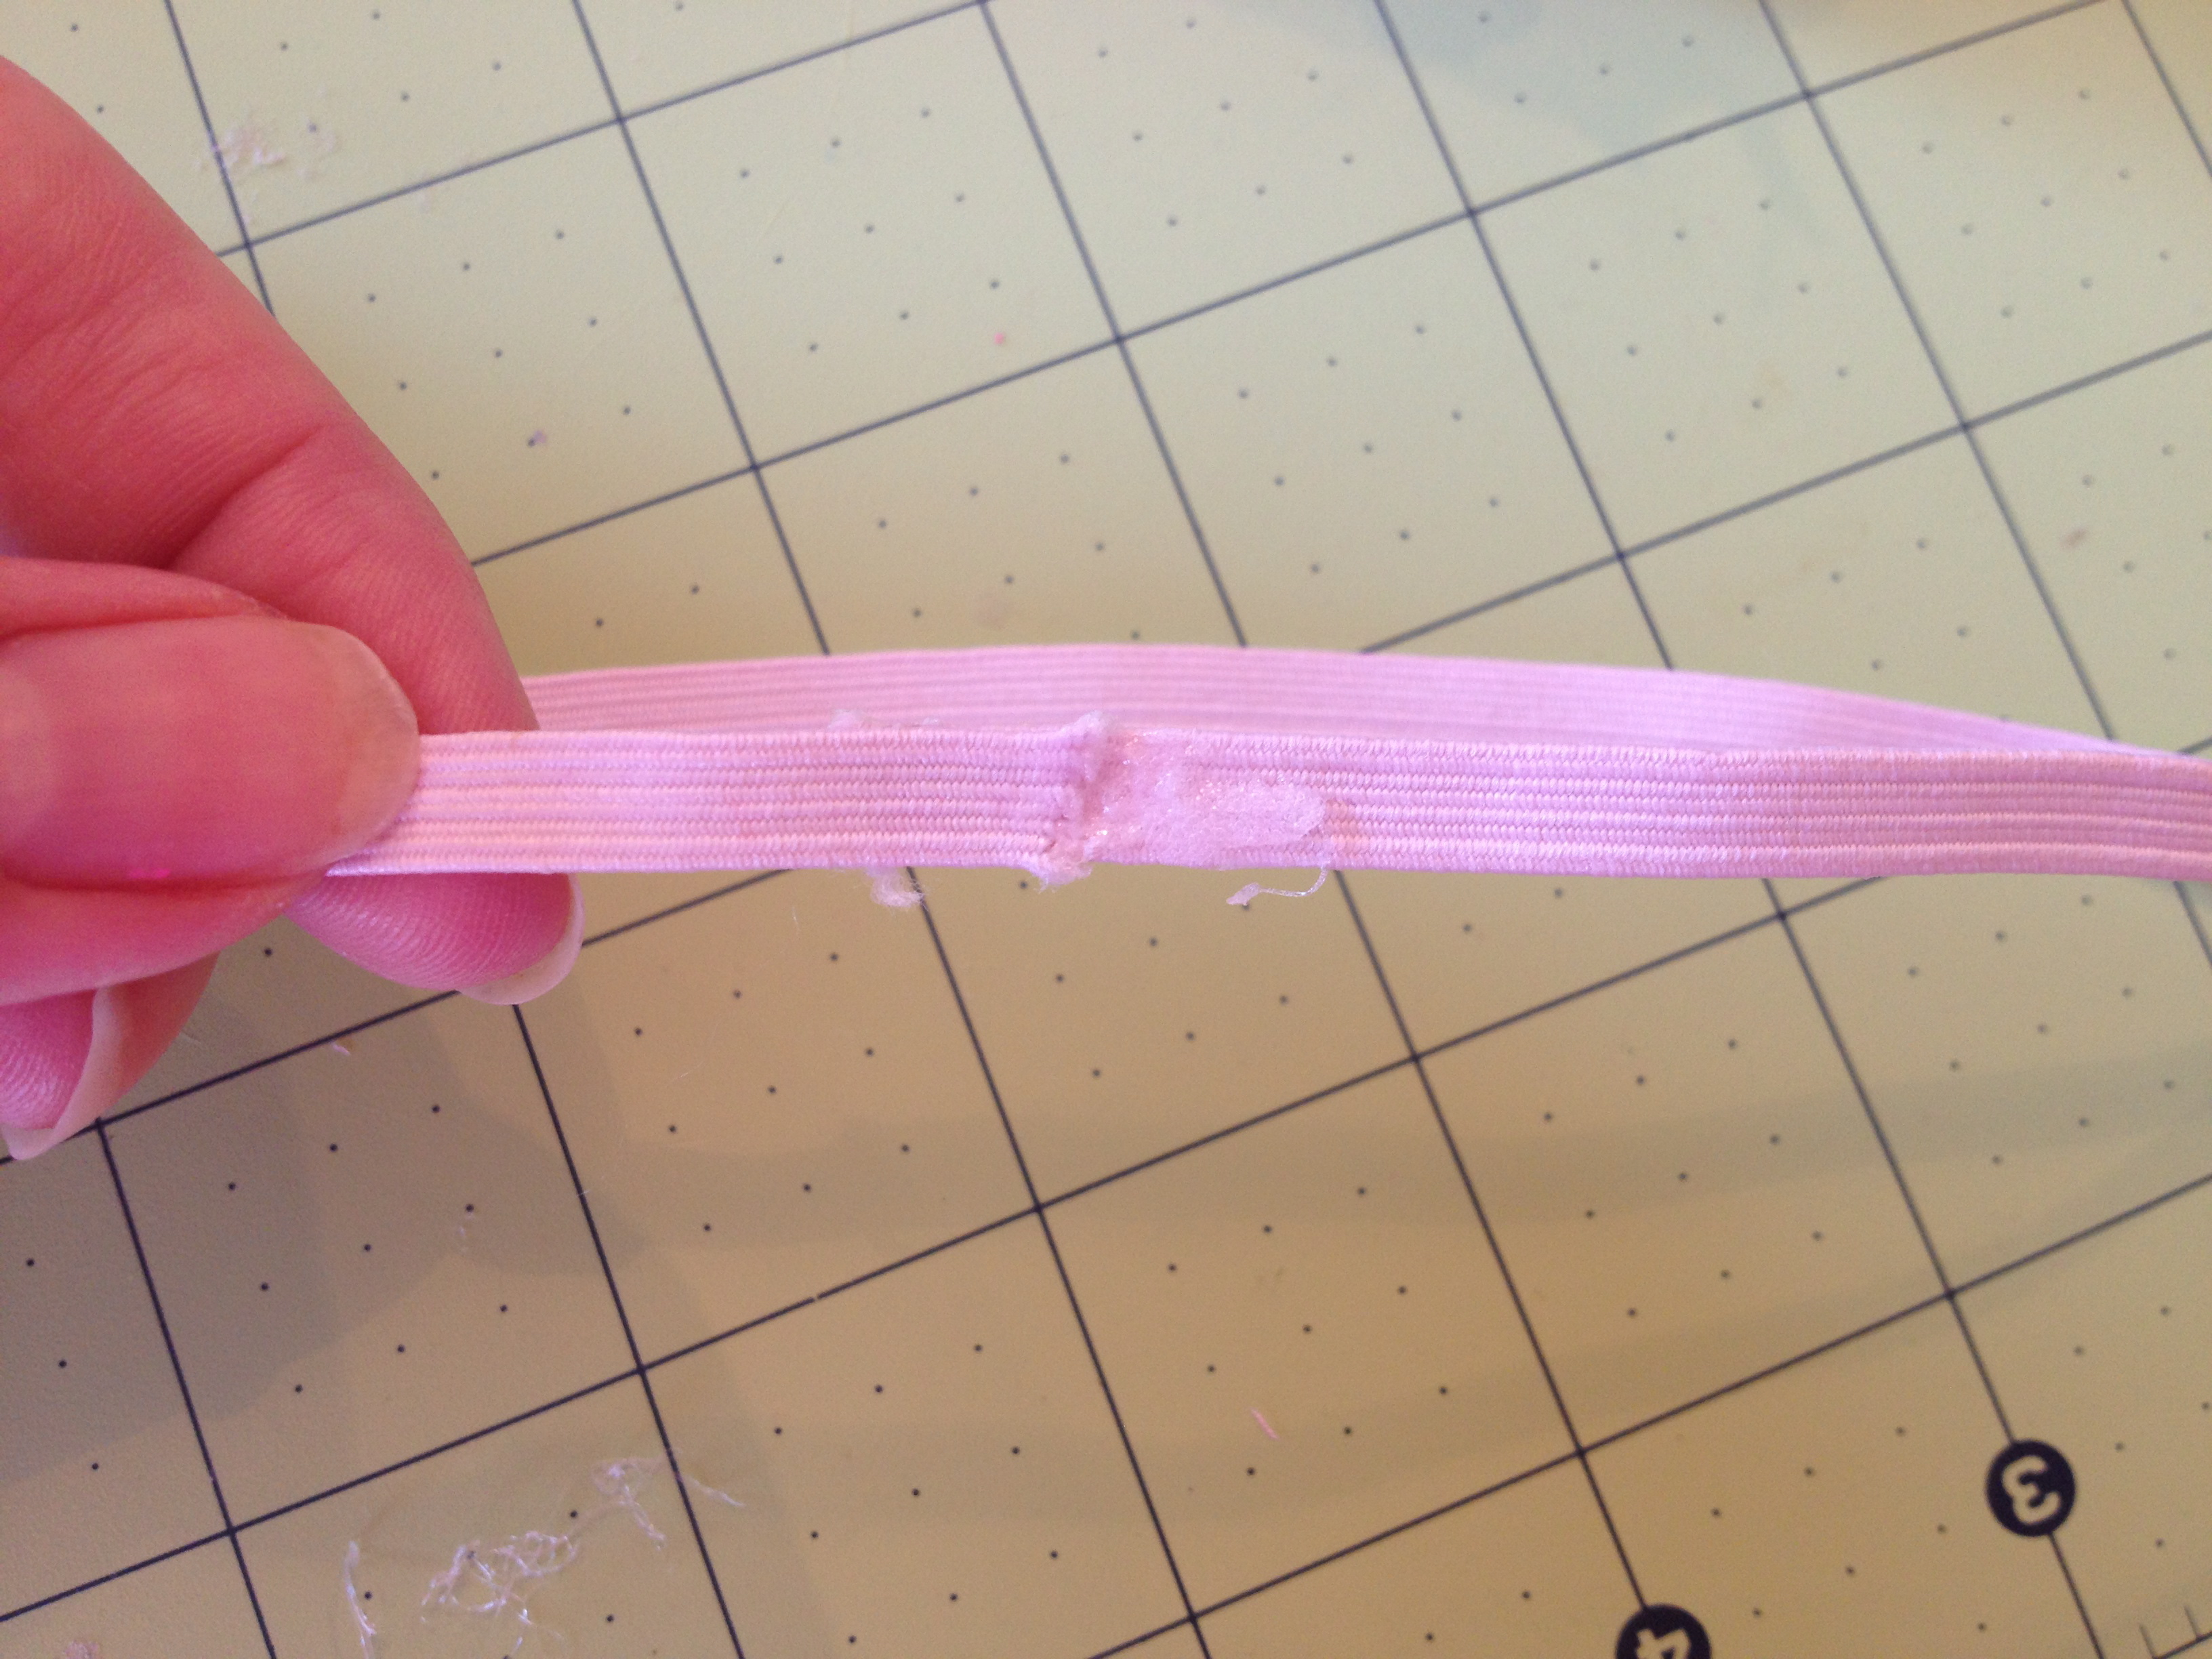 8. Glue the flower to the headband. After attaching the flower, glue the second felt circle to the back. The finished product will look like this from the back.
Variations:
You can make each headband look slightly different by adding multiple colors or cuts. I’ll show you a few examples. With this one, I glued a green and dark pink circle together with a small dot of glue in the middle. Then I proceeded to glue them on using the method above, but alternating which color was facing up. 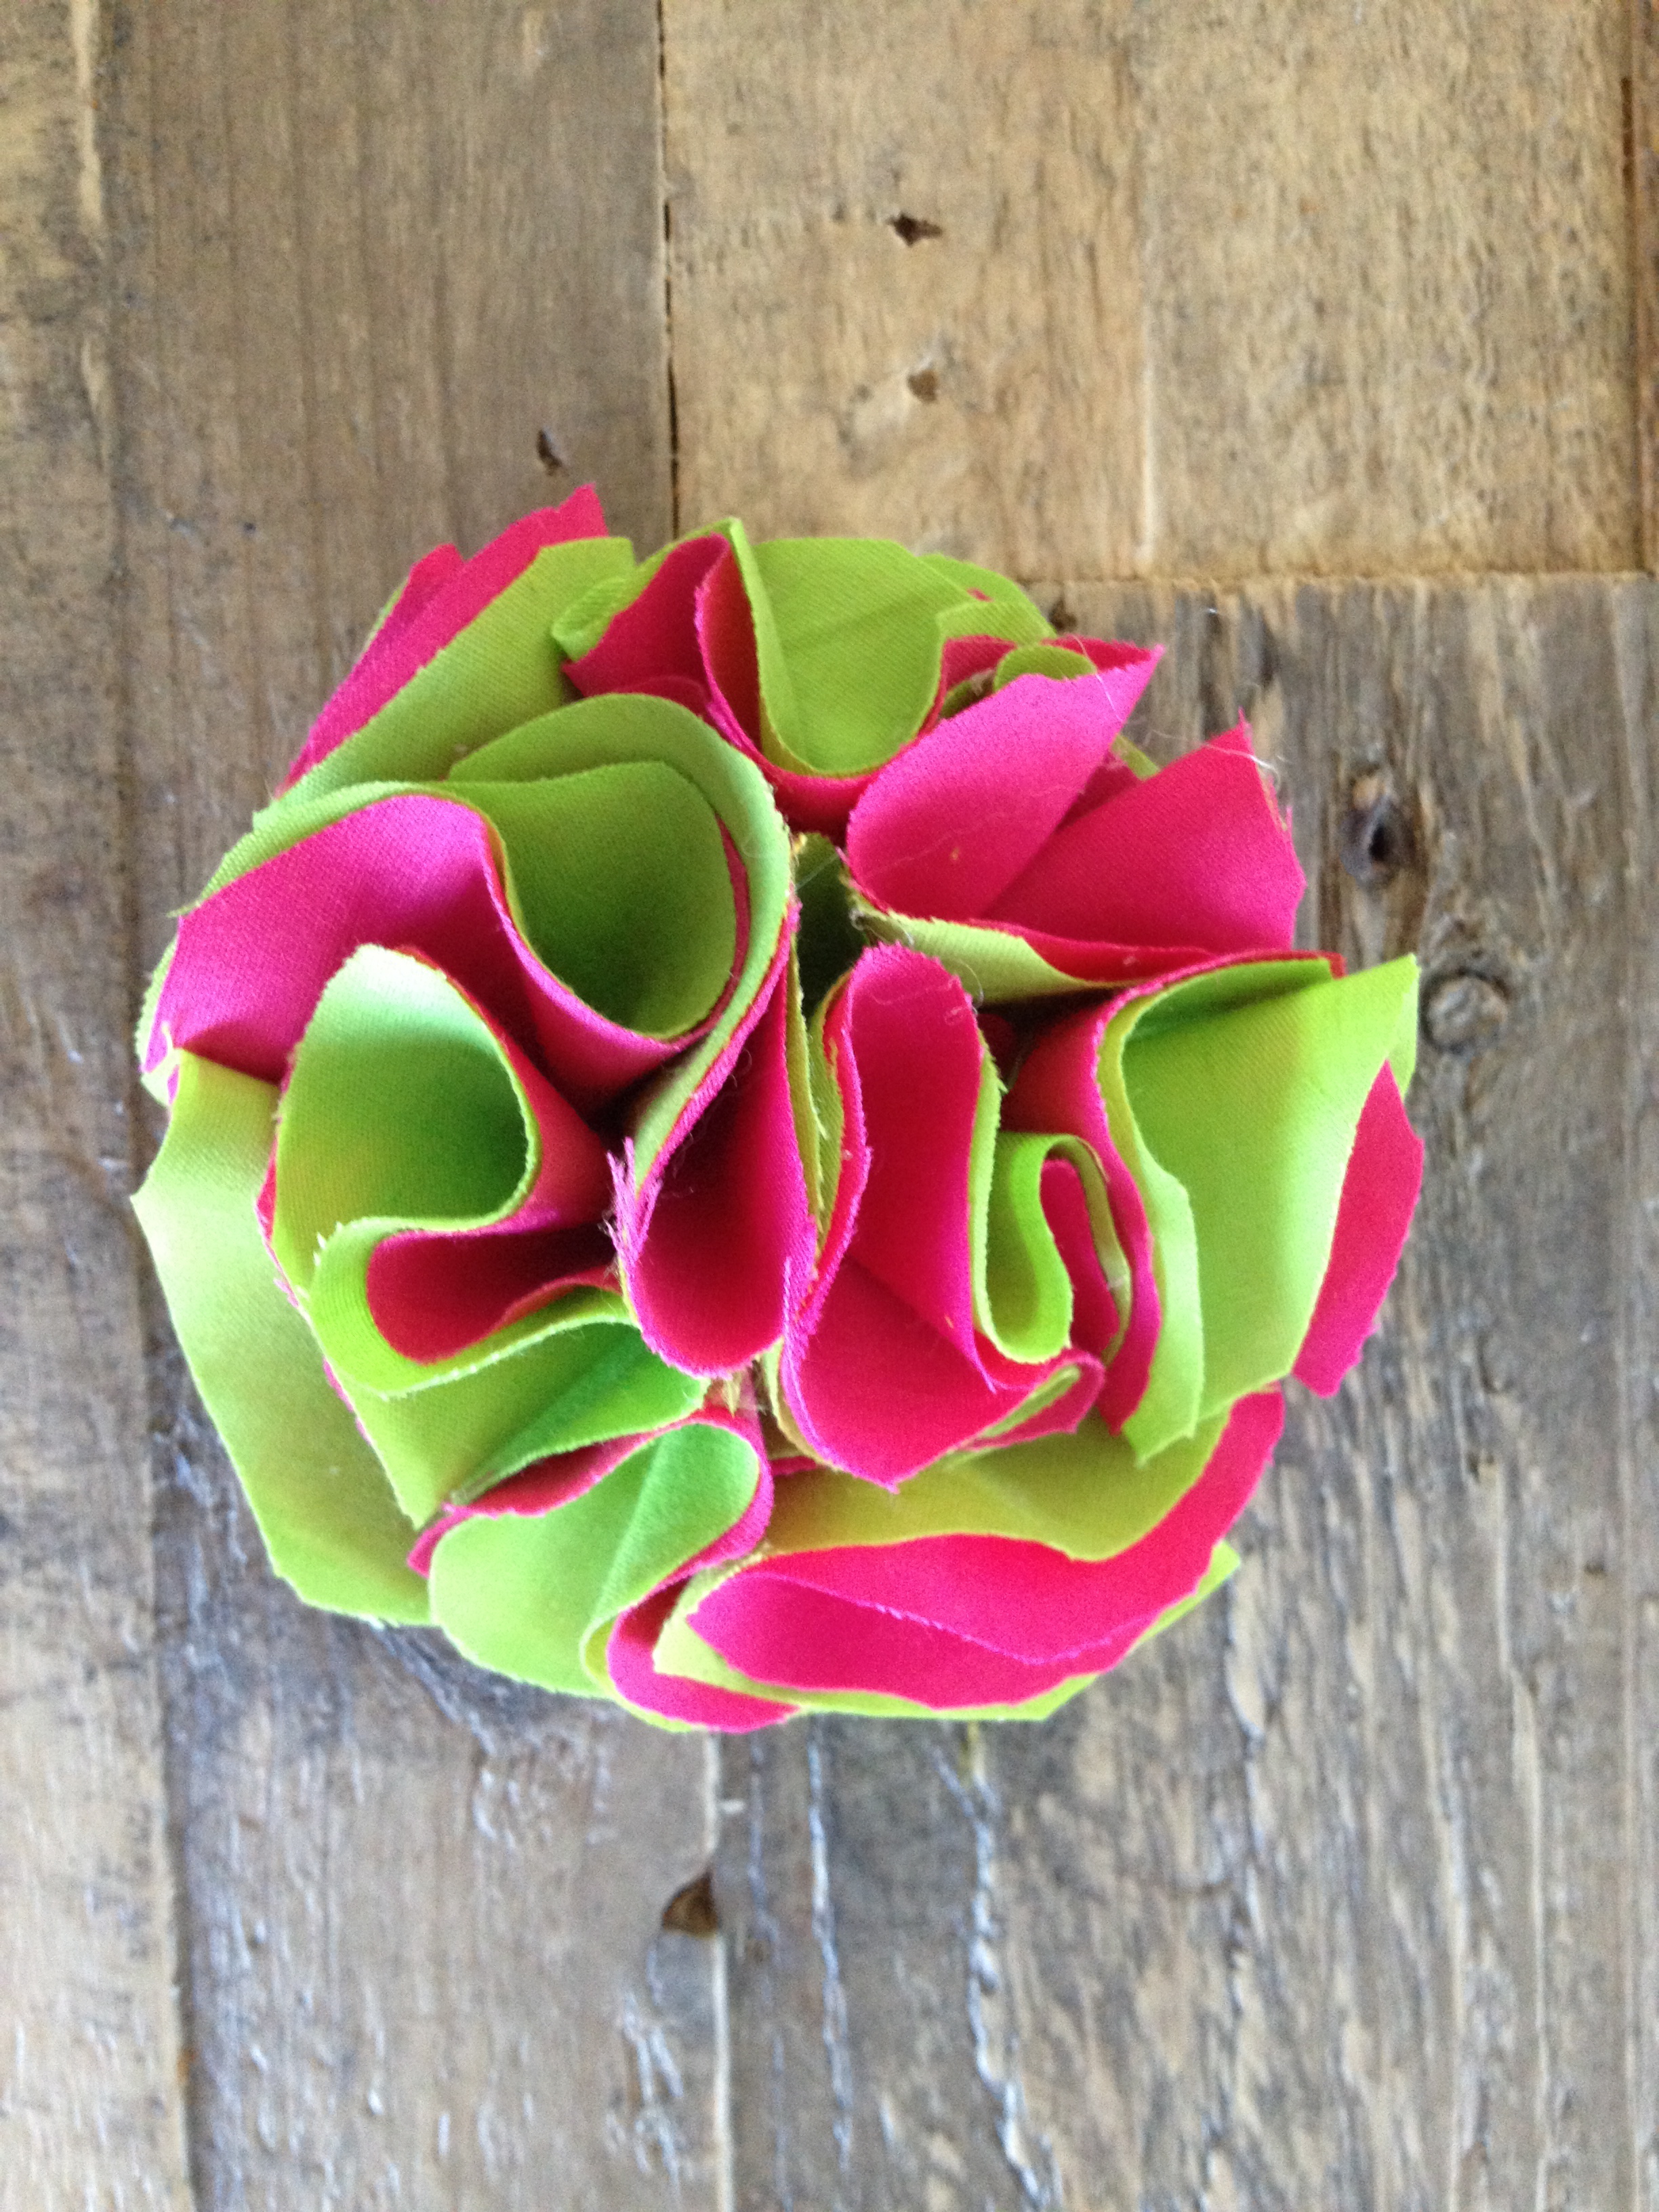 With this one, I cut the slits in the circles before gluing them on.
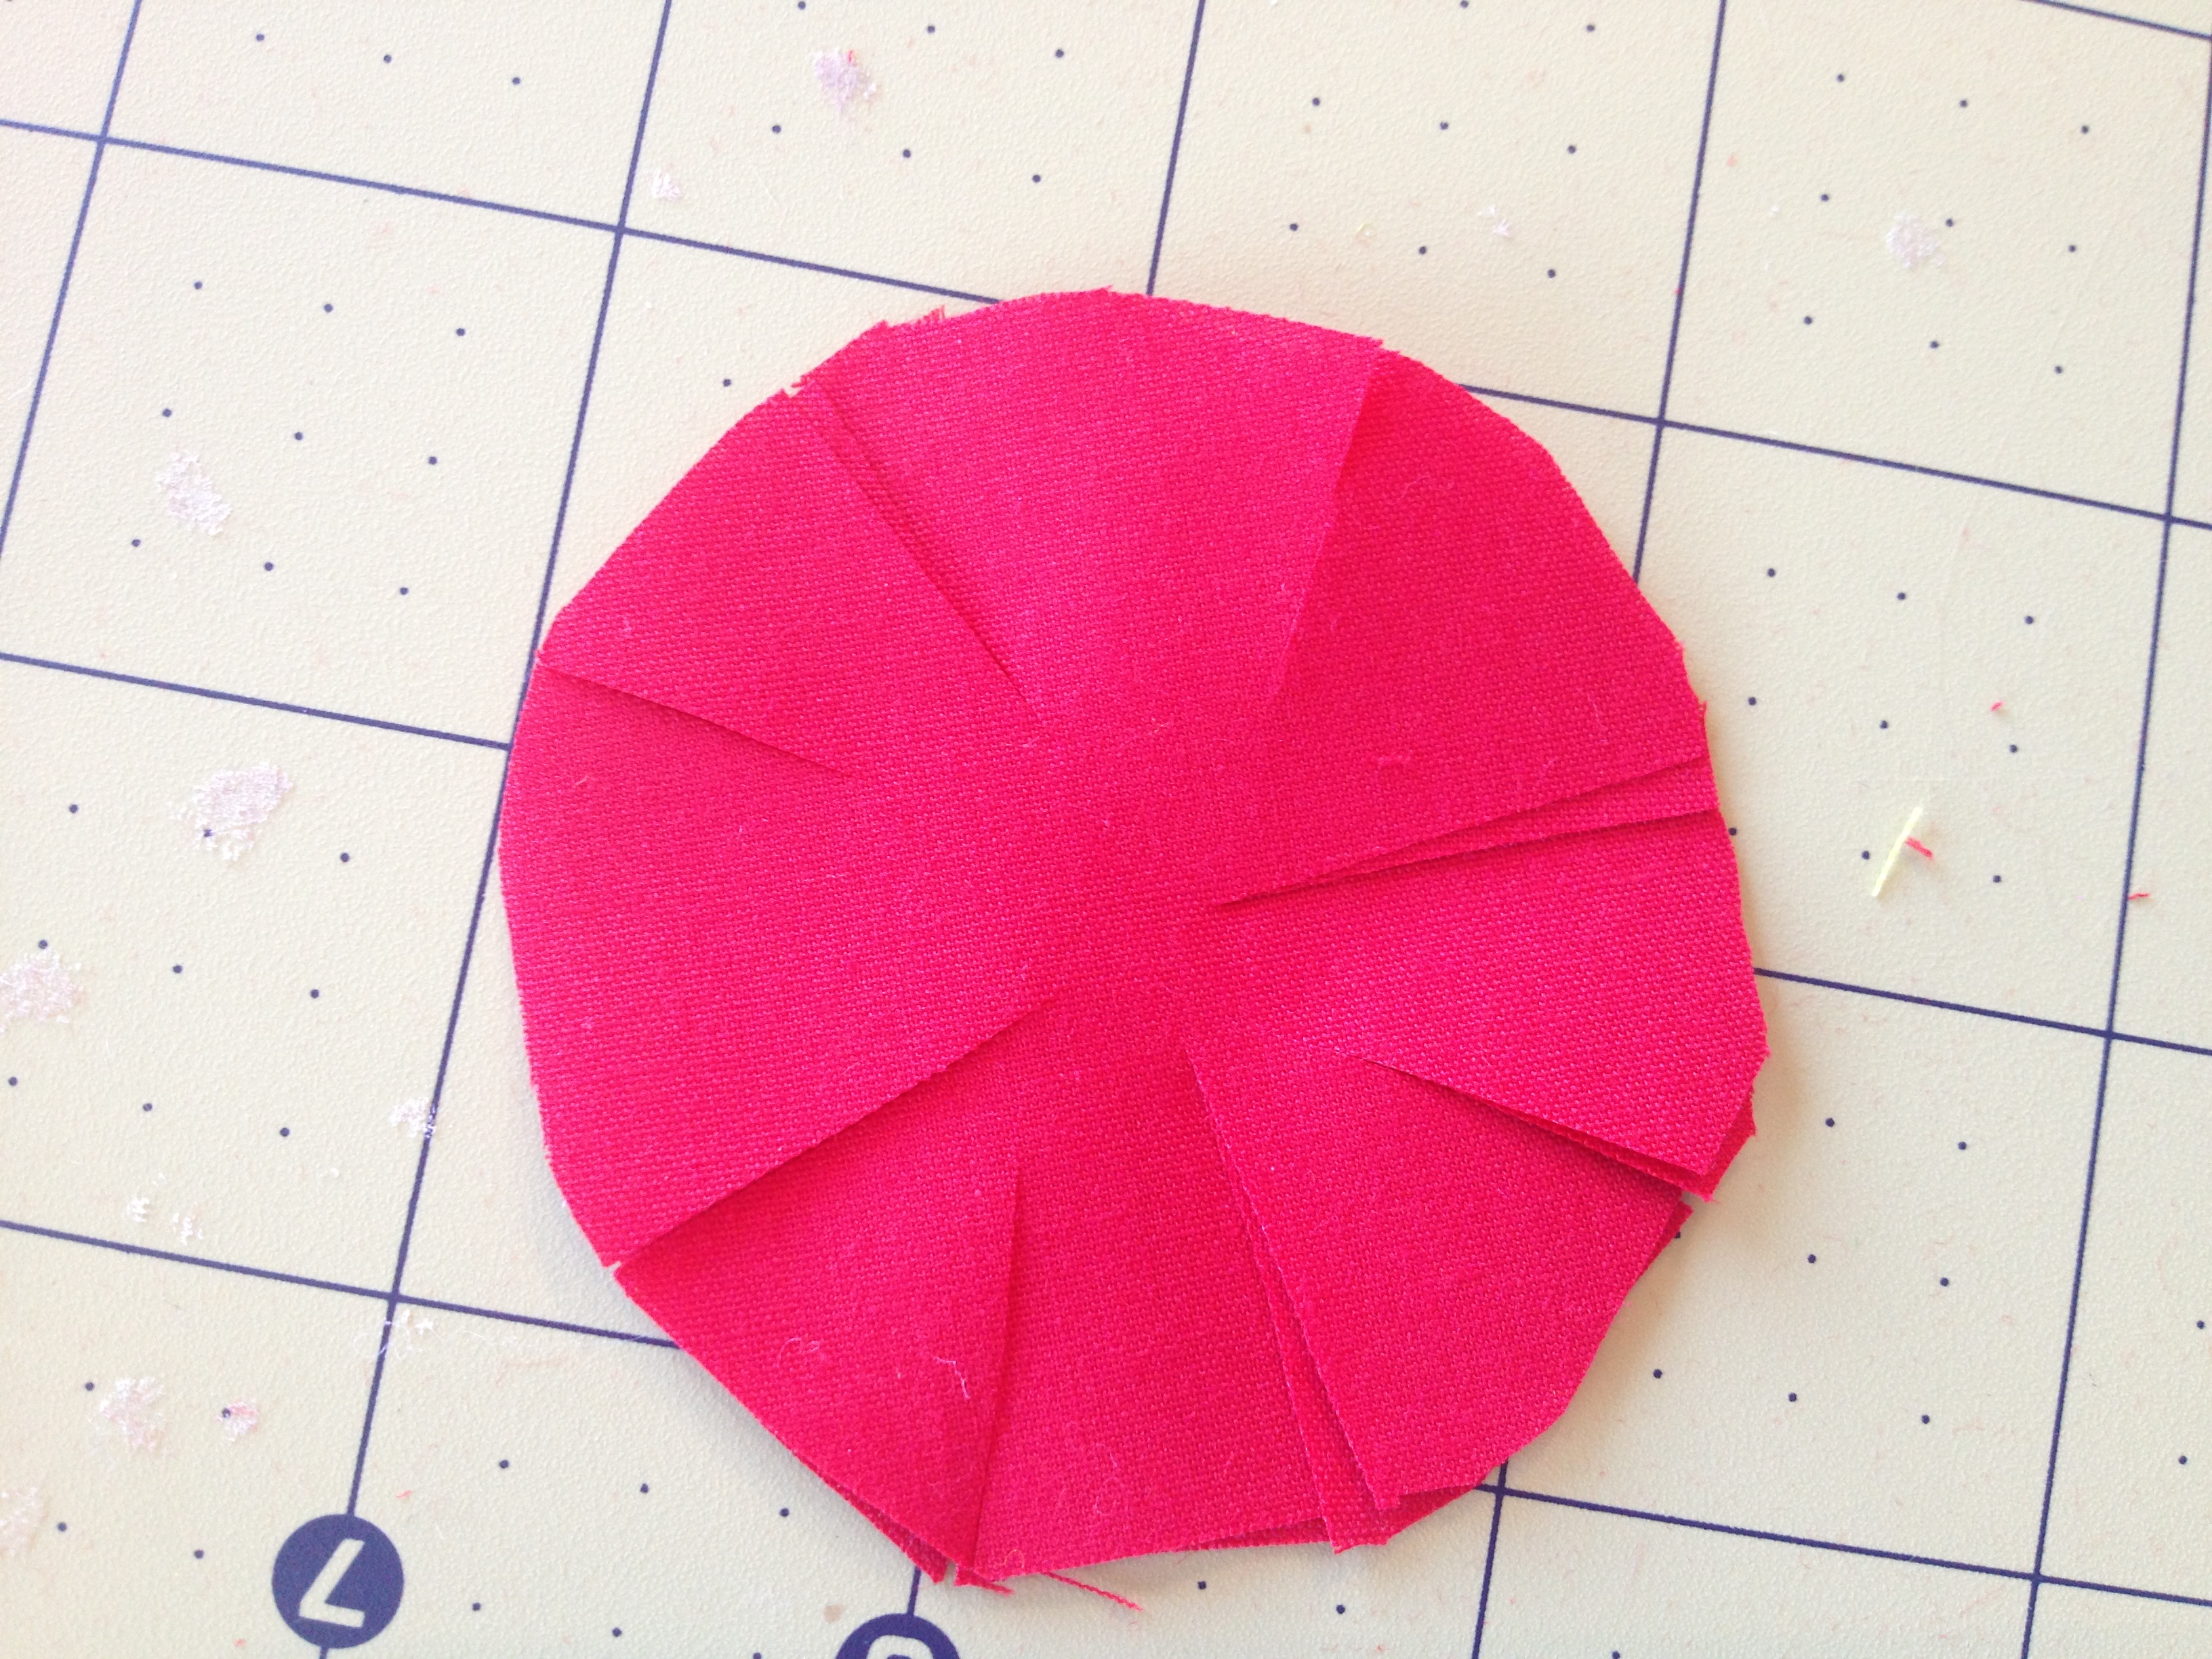
 With the next one, I glued colors together AND cut slits.
 For this green one, I cut even more slits, but only used one color.
 For the purple one, I glued three circles of tulle to the top of the purple fabric circles.
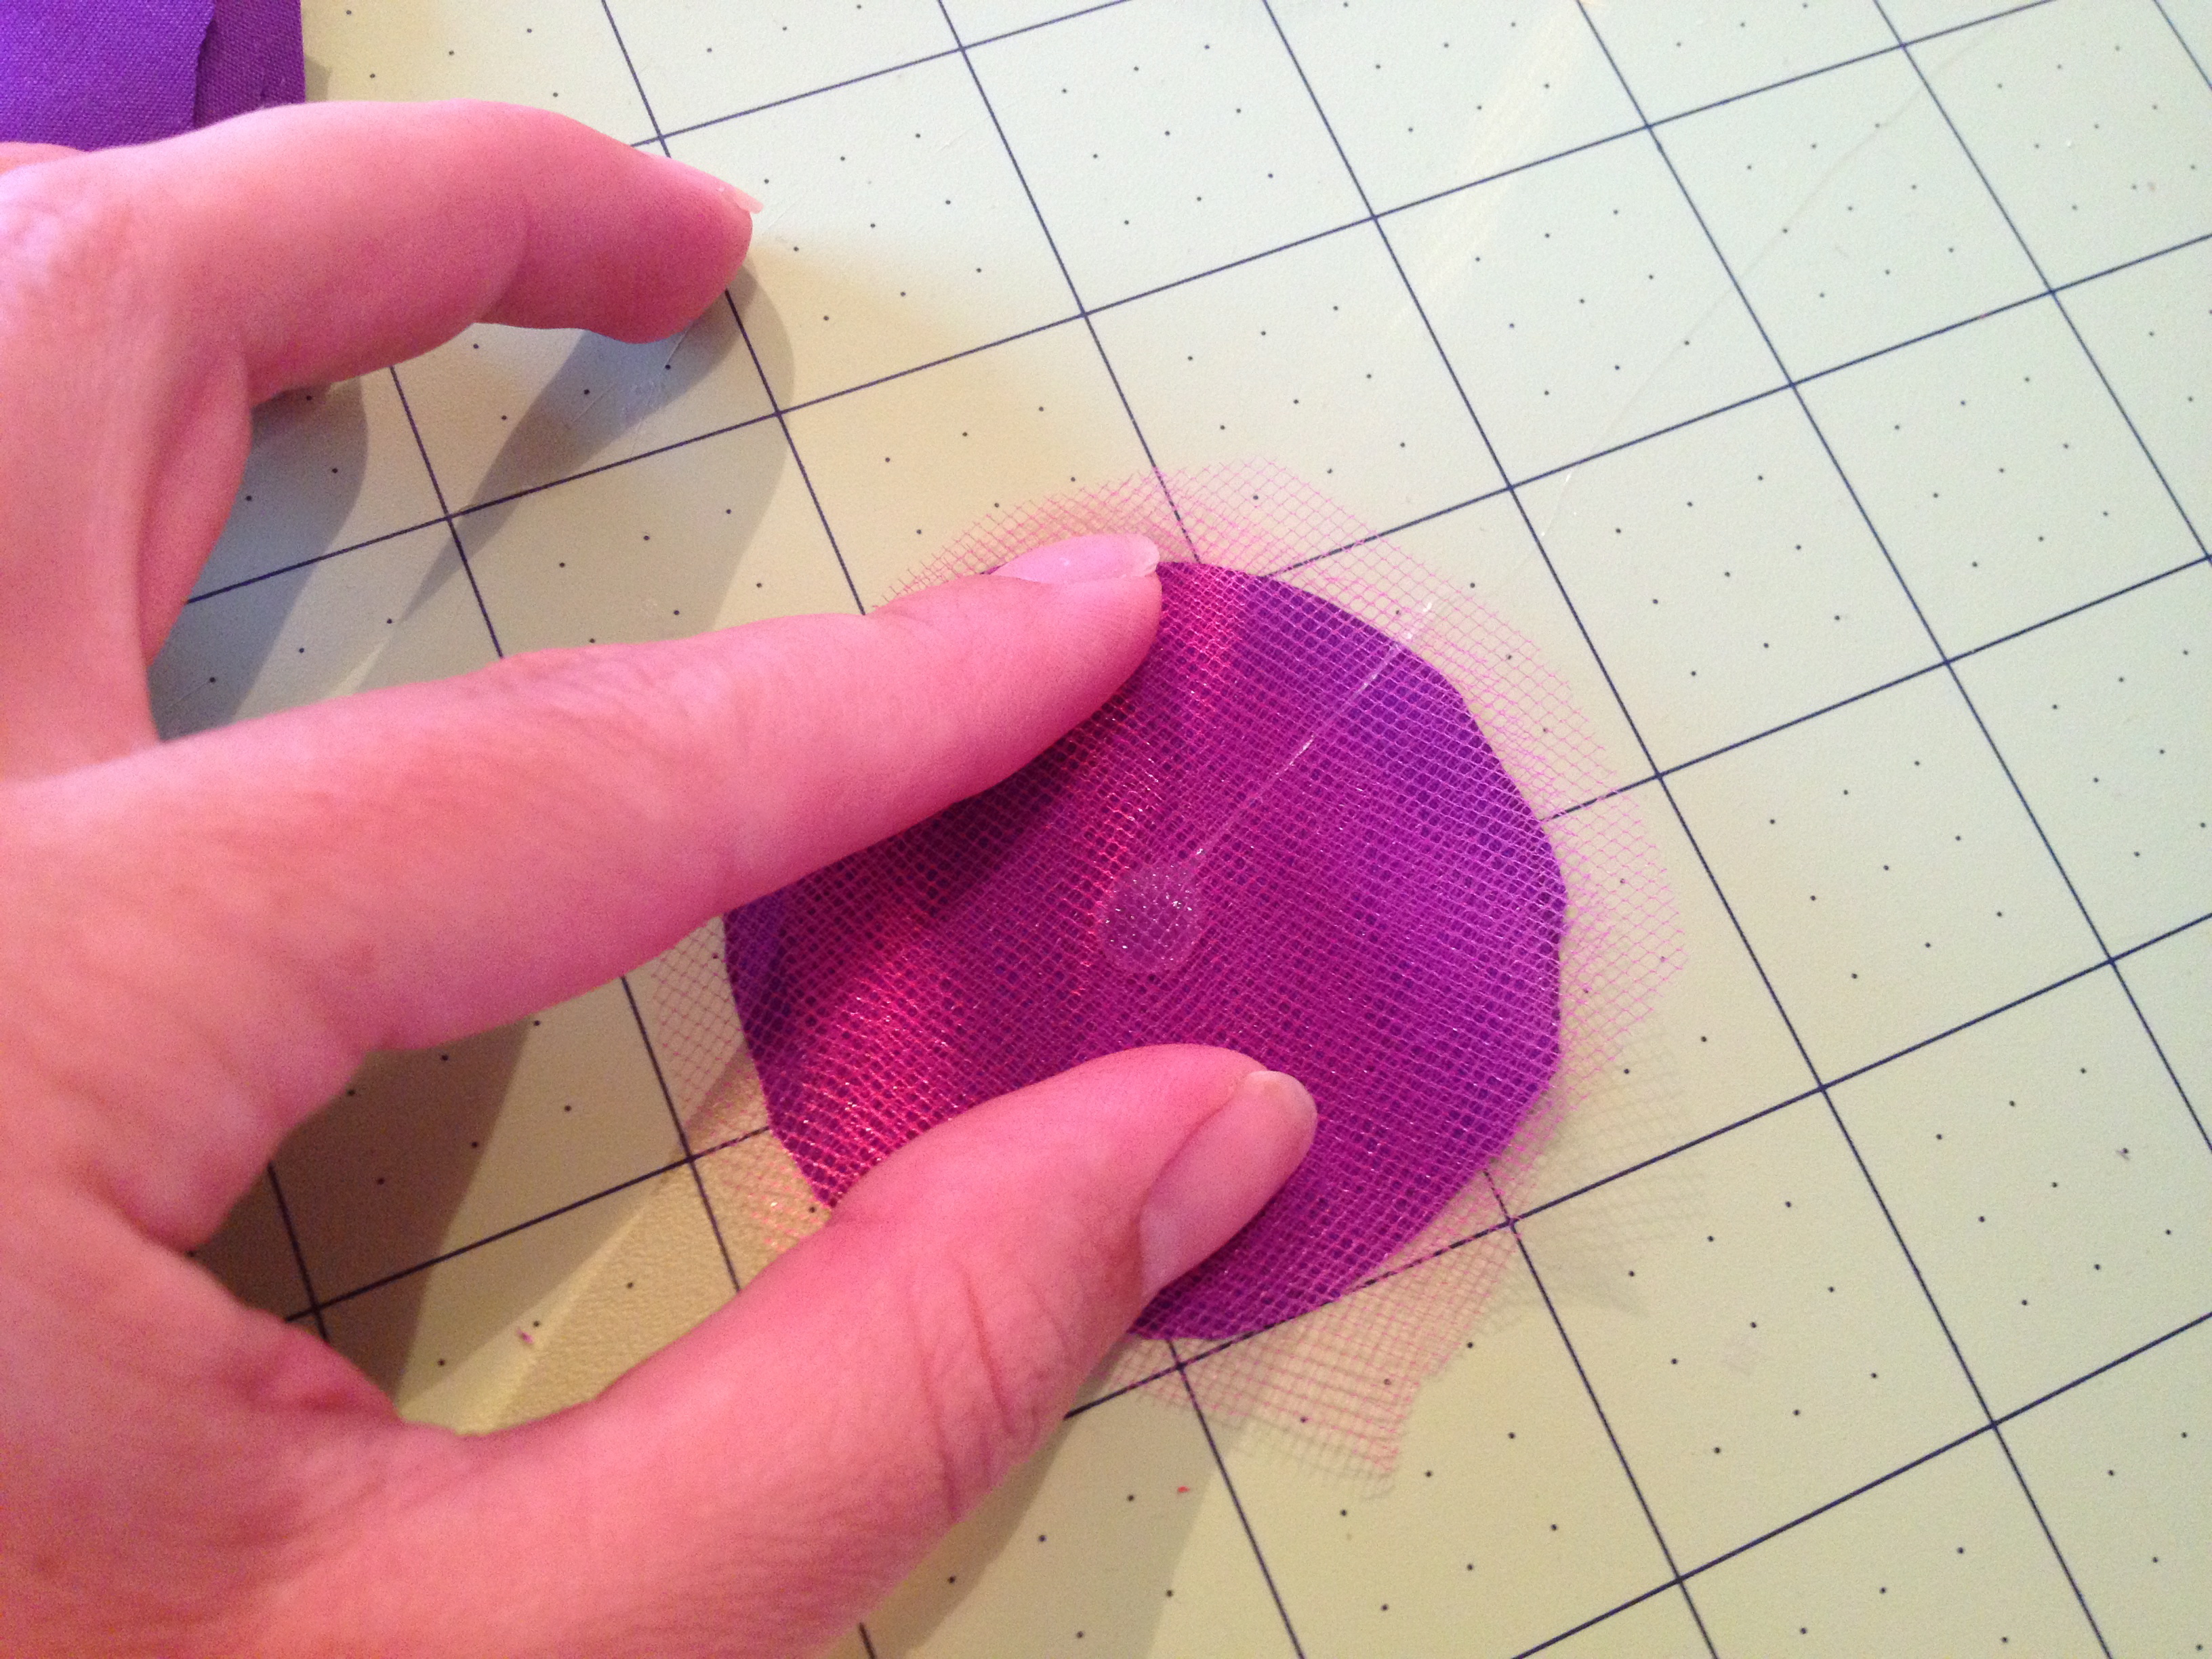
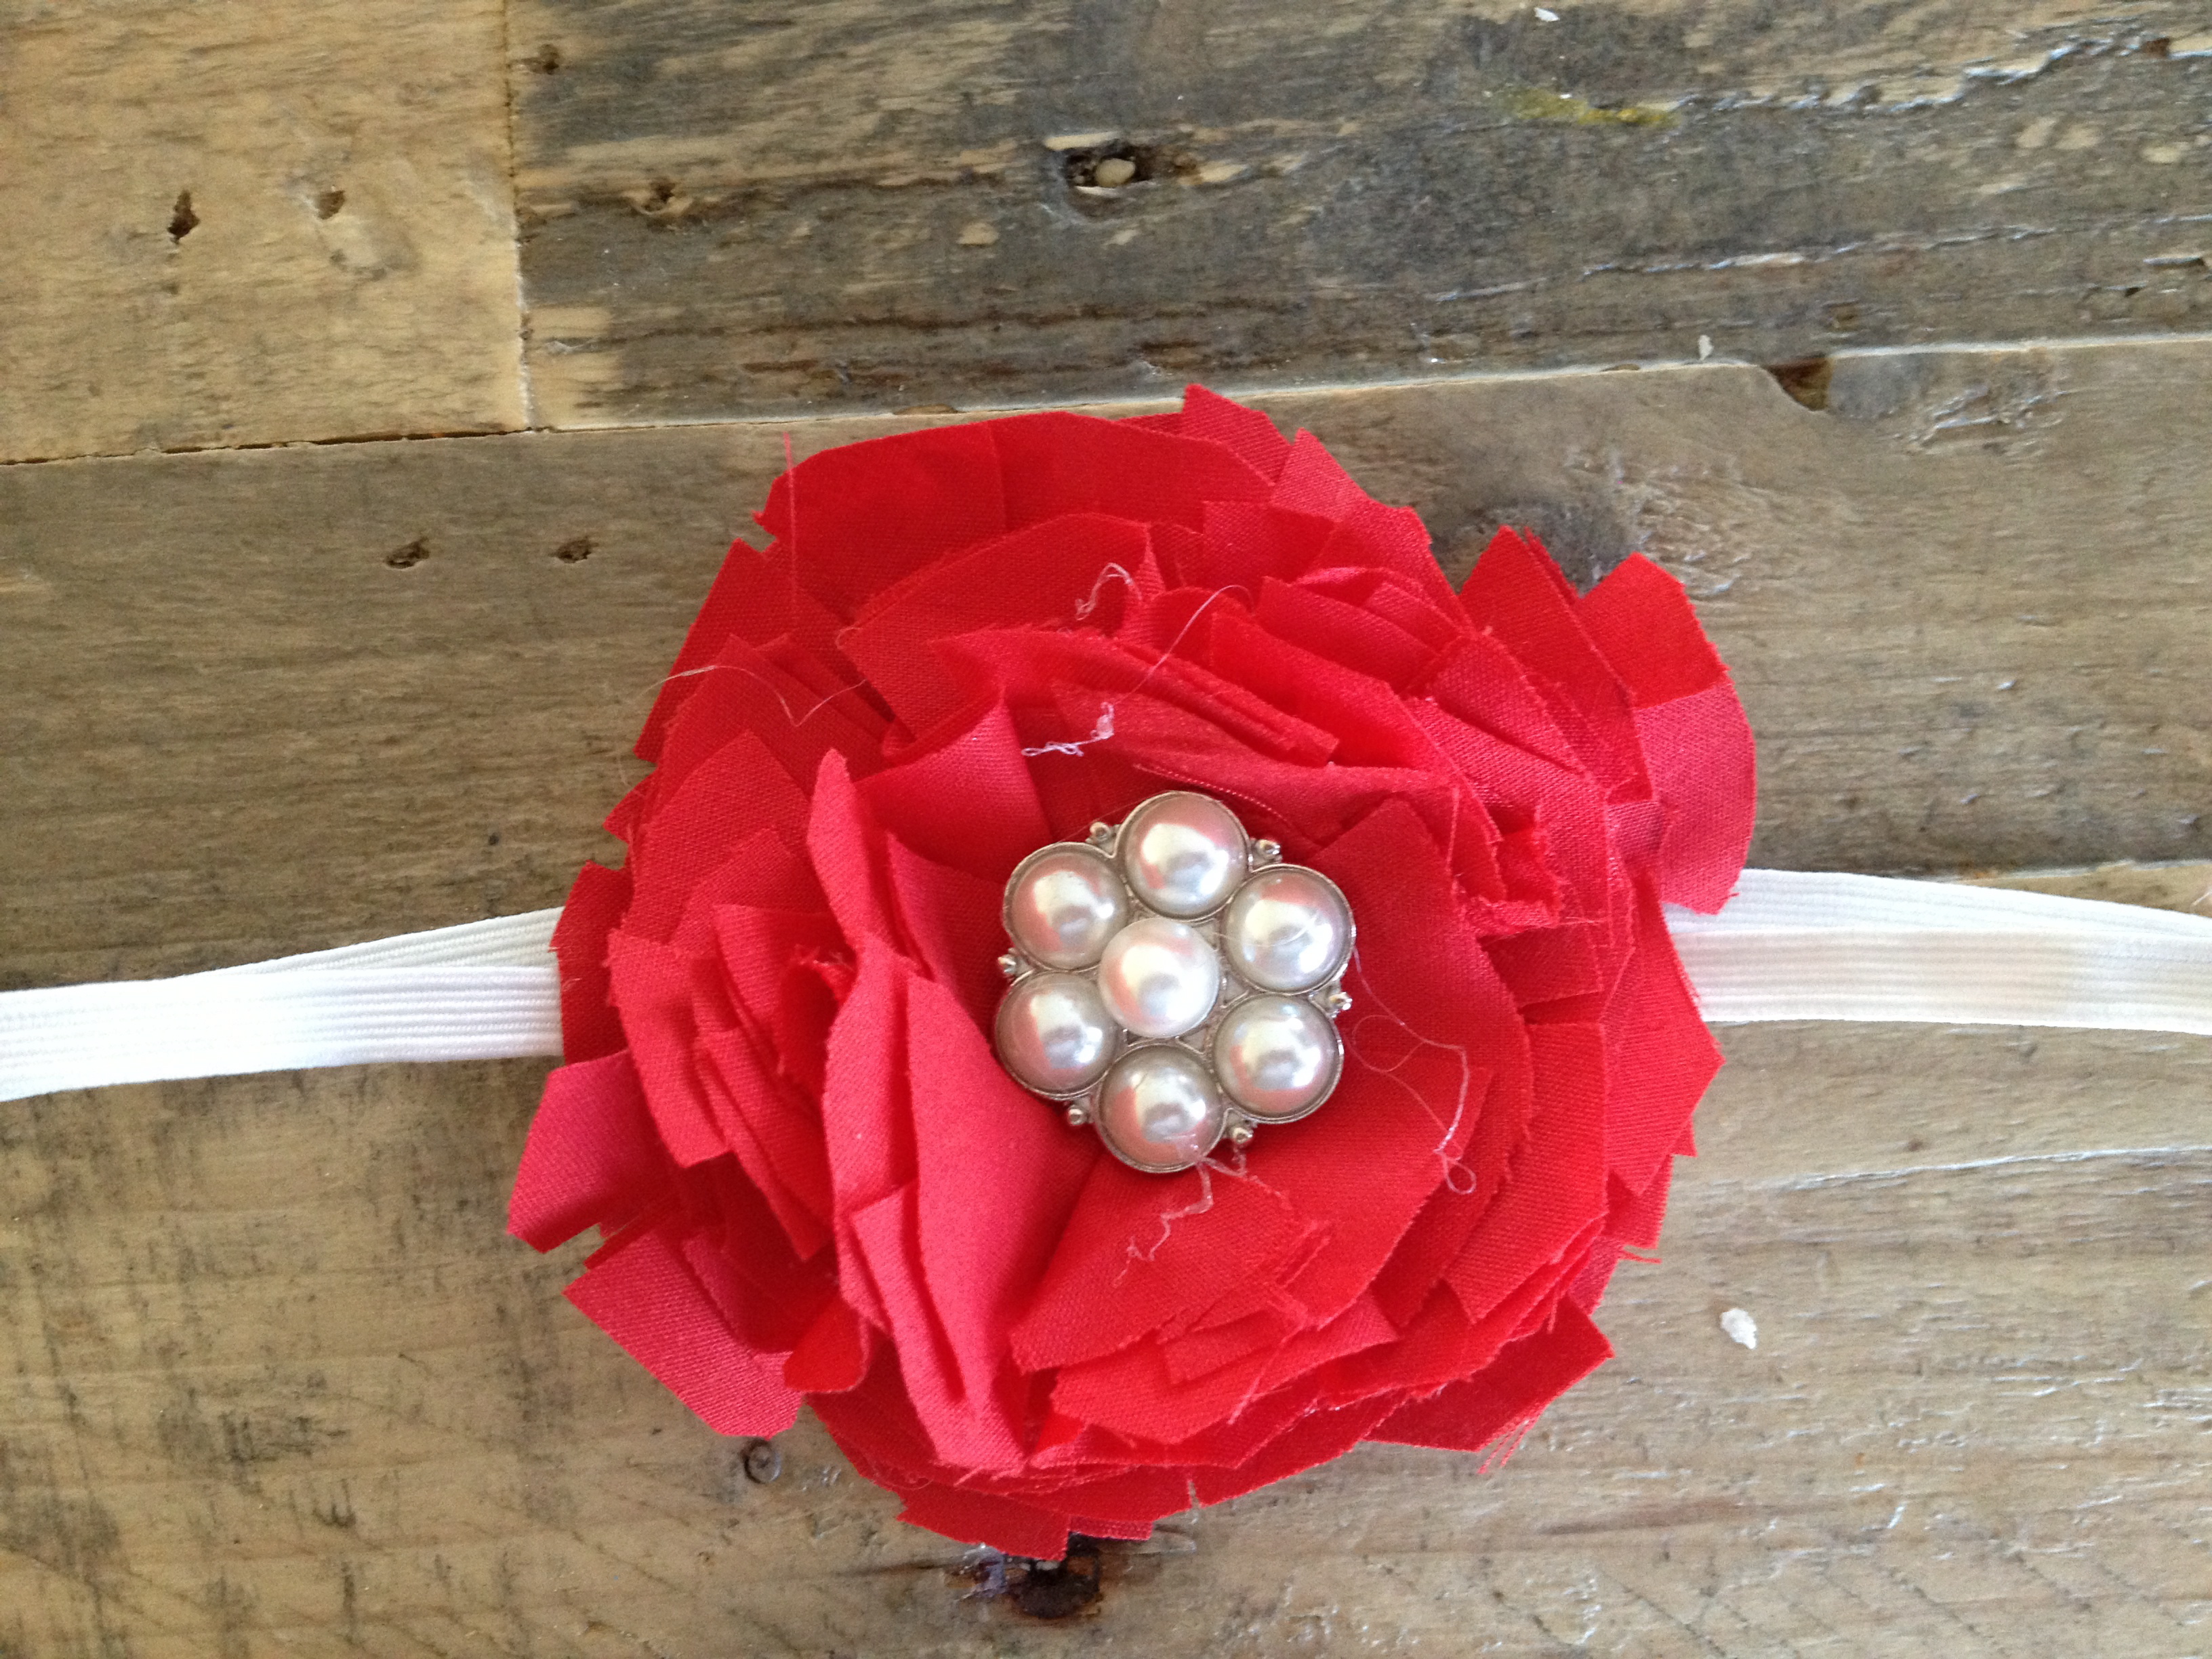
It’s as simple as that! As you have seen, the variations are limitless. You can create countless headbands for the price of one that you’d buy from a store, and no one else will have another just like it!
Go have fun making some pretties for the girlies in your life! I’ll be back next week with another way to add some glam to our babies!
XOXO,
Amber
P.S. For more reflections on parenthood and life, follow us on Facebook (Hun Let’s Run) and on Instagram: @ambermariekuiper and @jakekuiper! We’d also love for you to subscribe to our Hun, Let’s Run Podcast! For more info about joining our fitness community as a customer or coach, please email us at amber@mommysmetime.com!
15 Comments
Love those, I’m going to have to try these for my girls.
So fun and creative! You are a rockstar 🙂 Also these pictures of the girls are beautiful!! Your little ladies are gorgeous.
Thank you so much for this great tutorial! After two boys, I am loving little girl accessories for my little girl. Bows to match her outfits are my favorite!
Ashley @ 3littlegreenwoods
Hi Ashley! I’m so glad you enjoyed the tutorial! I agree, that girly stuff is so much fun, especially after having a boy(s) first! Blessings to you!
I am not crafty in the least bit, but this made it so easy for me!! Great tutorial! I’ve already made 5 and must admit it is addicting!! Can’t wait for our little bundle to get here so she can start wearing them! Thank you so much!!
Oh yay! I’m so glad you made some!! I agree, it is so addicting!!! Have fun!!!! And congrats on your baby girl – blessings on a safe and smooth arrival!!
I LOVE these!! So cute and easy. Thanks for sharing. 🙂
Your girls are adorable. We have twin girls as well, so nice to find other “crafty” twin moms. Thank you so much for sharing this tutorial.
Oh how fun that you have twin girls too! It’s so fun crafting for them!!!
[…] If you’re interested in another headband tutorial, you can check out this one on my personal blog: DIY Pom Pom Headbands! […]
OMG simply adorable! 🙂 Great job! Jen @ http://www.sweetbabybowtique.com
These are really adorable! Have you tired covering the elastic with fabric..if so, does it still work the same?
Thank you Pamela! I haven’t tried covering the elastic with fabric, but that sounds like a fun idea! Let me know if you have luck with it!
They’re gorgeous, you clever thing and so are your babies! I have a question which I am too scared to ask anyone ‘in the flesh’ as we mums are very sensitive. I always think wearing something like this must be quite uncomfortable. I guess you would be in a position to notice… did they start grizzling or trying to pull away at the elastic at all?
Catherine
My brother suggested I might like this blog. He was entirely right. This post actually made my day. You cann’t imagine just how much time I had spent for this info! Thanks!